DVD Cabinet Routing Project
An old oak wardrobe and the side of a packing case is transformed into this classic looking cabinet!

This is another project designed to use up some recycled timber, in this case the remains of an old oak wardrobe and the side of a packing case, which for some reason was made from oak faced MDF. Once you get your eye in there is loads of this second-hand timber around, either in the form of old furniture or packing materials, so keep your eyes peeled and you will soon be making furniture with no material cost.
The project is designed to finish at roughly chair height to act as a small side table as well but modify the design to make it as tall as you want, or add shelves at different spacing to take Cds as well.
Step 1 - Selecting and Preparing Timber
Unfortunately, much of the wardrobe was unusable but I did manage to salvage some thin solid panels, as well as some thicker strip material.

The packing case MDF was rather heavy for this job at 18mm, but beggars can´t be choosers and the narrow returns on either side of the finished unit were fitted to disguise this thickness.

Start by machining the two sides, planing them up together to make sure they are exactly the same size and also to provide more stability for the planer.

When you come to crosscut this thinly veneered material you inevitably end up with one good face and one where the veneer is ragged by the action of the saw.

A good tip is to scribe along the cut line on one face using a sharp craft knife, cutting right through the veneer face.

Then with this scribed face uppermost, make the cross cut on the sliding head mitre saw by pushing the saw back in towards the fence rather than pulling it out. This way the emerging teeth which are what normally cause the ragging do not do any damage, as the veneer is already pre-scored.

One disadvantage of second-hand material is that it is often quite wasteful and I only just managed to get out the narrow facing pieces from quite wide boards, as I had to work around lots of nails and screw holes.

Another problem you often come across is that heavily stained material like this is often made up from several pieces whose original colour doesn't necessarily match particularly well. The only way to overcome this is to re-stain the finished piece.

The front facings are attached to the sides with biscuits, so mark out the position for these and number each piece accordingly.

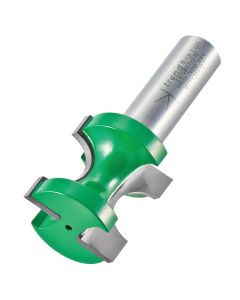
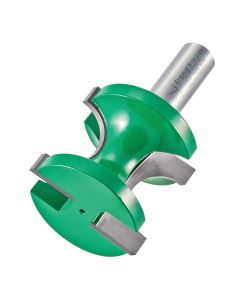
The biscuit slots can be cut with a dedicated bearing guided cutter in the router, I set this with the middle sized bearing for number 10 biscuits.
Step 2 - Slotting and Routing Application
Set the cutter to be approximately on the centre line of the board, although this is not critical provided you lock up the depth setting on the router securely and do not alter it for any of the subsequent cuts on the sides or the facings.

Make the slot slightly longer than the length of the biscuit to allow some leeway at the assembly stage.

The matching slots are cut in the facings by holding them in the vice and using a side panel laid on the bench to provide some extra support to the router base.

Provided you do not make any alterations to the plunge depth on the router the facing strips should now line up perfectly with the sides when the biscuits are in place.

The centre board and the shelves are machined from another piece of the thinner material and once again there were a few surprises in store as regards the colour underneath the dark brown stain.

Cut a slot down the middle of each side piece to accommodate the centre board. It is easier to cut the slot first and refine the thickness of the centre board to be a snug fit, rather than doing it the other way round.

Check that it fits easily rather than being excessively tight or you will find the assembly stage difficult later, particularly as I intend to stain and polish the components before assembly.

Use a straightedge and a 4 mm straight cutter to machine the grooves for the shelves. Clamping the two side pieces together edge to edge ensures that the grooves will line up perfectly.

The biscuit slots on the end of the shelves are cut with the grooving cutter, clamping them to overhang the bench to give the bearing and arbor the necessary clearance.

Try a dry assembly at this stage to make sure everything fits together properly.
Step 3 - Glueing and Clamping
Start the final assembly by gluing the facing strips onto the sides clamping them in place while the glue sets.

As you shouldn´t need excessive pressure to pull the joint up tight I never bother with backing pieces between the work and clamp faces, particularly when working with hardwoods like this oak.

When the glue has set, lightly sand the joint to get it perfectly flush using a random orbit sander, but take great care as the veneer is very thin and it is easy to sand right through, particularly at the edges.

The material for the base and top is machined up next and consists of three more pieces of the veneered MDF and some more solid wood lippings machined to the same thickness as the MDF.

These lippings are cut to length and mitred, taking great care to get the mitres spot on. This is considerably easier if you have cut the MDF pieces perfectly square in the first place!

I didn´t feel it was necessary to biscuit joint the lippings and ended up just gluing and clamping them in place, but check carefully as you apply pressure with the clamps that they do not slide out of place.

Also, make sure that the clamps do not come into contact with the wet glue, particularly with timbers like oak and chestnut, or you will end up with black stains that are difficult to remove later.
Step 4 - Router Table Applications
A router table will be used in order to form the top section of the DVD cabinet.

When this is dry give it all a good sanding with the random orbit sander finishing off with 240 grit paper.

To try and disguise the thickness of the top and bottom I set up a panel raising bit in the router table to form a flat ogee shape.

Because there is no end grain on the lipped panels, there is little danger of breakout, but even so work the moulding in several steps, finishing off with a very light cut to leave a perfect finish straight off the cutter.

The baseboard is machined with a staff bead cutter and as this machines away the complete edge you need to fit a shim on the back router table fence if it is not independently adjustable. I find a steel rule temporarily stuck in place with some double-sided tape ideal.

The finished profile of the two pieces of the base goes some way to disguising the rather excessive thickness.
Step 5 - Final Application and Assembly
The cabinet now needs to be assembled, with additions of the Lazy suzan and a coat of brown mahogany stain.

To make the cabinet swivel a lazy Susan bearing is fitted between the two components of the base, recessing some of the thickness of the bearing into the bottom board to minimize the gap.

To bridge the space over such a large recess I use a Perspex sub base screwed to the underside of the router. You do not need to be too fussy here as the bearing cannot be seen in the finished piece so I just worked freehand to a pencil line marked around the bearing.

With the bearing in place drill a single hole right through one corner to allow you to screw it into the underside of the other half of the base later.

As the components all varied so much in colour I applied a brown mahogany stain to even things up. This process is very much easier if you can do it before the final assembly. I also brushed on a couple of coats of cellulose sealer once the stain was dry.

Now, you can start to put it all together, gluing the centre board and the shelves in place first.
Step 6 - Finishing Touches and Presentation
Some futher touch ups on the dvd cabinet are needed before the project is finished.

The base board is screwed onto the uprights but drill the pilot holes carefully to make sure you don´t split the facing pieces.

The Lazy Susan is screwed in place in the base section first.

Then on to the base of the cabinet, fixing the four corners of the bearing through the hole you drilled earlier.

The top is fitted in place with four biscuits and glue and then clamped using some heavy weights to hold it in position.

This is the completed DVD Cabinet Routing Project.