Handling and Feeding the Router
Newcomers to routing have the understandable tendency to grip the tool tightly and press it down too hard onto the work. However, this tends to inhibit smooth movements and in fact the router is then more likely to snatch.Instead, hold the router by the side handles in a firm but relaxed way and complete each pass in a steady continuous movement, keeping the same feed rate throughout.

Most routers have their handles set fairly low on the base which gives better control. However, the lower you can hold it the better and there are some specially made sub-bases which you can bolt on for better balance and to reduce any tendency for the router to tip.

Plunge cutting

When you need to plunge cut into the face of a board, firstly preset the required depth using the turret stop, if you are going to make several passes. Adjust the side-fence and position the cutter carefully at the beginning of the cut. Switch on and allow the router to reach full speed, push down firmly on the handles until the depth stop engages and then lock the plunge.

Make the required pass, release the plunge lock, allow the cutter to withdraw and then switch off. If you are making multiple passes for a deep cut and particularly when plunging right through the work, it is better to set a cut depth of only 1.5 mm for the final one to leave a perfect finish.

Portable folding benches with moveable jaws give a huge clamping area and you can hold workpieces both vertically and horizontally. You can also use dogs in the same way as the tail vice on a conventional bench, or even hold tapered work, as either end of the vice opens independently. The only snag is that they are rather low and therefore uncomfortable to work on for any length of time.

Try supplementing one of these benches with a false top that raises the height and increases the clamping options. Screw it to a block held in the vice jaws. Repetitious jobs with thin work pieces may justify making a separate workboard that uses folding wedges for simple and speedy clamping. Use them in conjunction with battens or pegs screwed to the workboard.

Another way if you need access to all the edges, is to glue or screw the work to a backing board that in turn can be gripped in a vice. You can even use the straightedges of this board as a guide if you need to rout in a straight line across an irregularly shaped piece. Hot melt glue guns allow very secure and rapid fixing without any form of obstruction. A pea-sized blob will hold a reasonably large piece of work, just use more for bigger pieces. Afterwards you can prise the two components apart with minimal damage.

However, by far the most useful way to get a temporary fixing in this situation is using double-sided tape. There are various types available, ranging from the thin variety sold in stationery shops, to the really heavy cloth type used by carpet fitters. They work best on a clean, flat, dust free surface. A melamine-faced workboard is ideal, but you may need to seal porous substances to maximise the holding power. Even a small amount of tape gives tremendous grip, but apply plenty of pressure initially to get the adhesive to stick, and then the downward force of the router should be enough to hold everything in place as you work.

Sometimes it is necessary to cut right through the work which will obviously damage the bench surface. In this case use a piece of sacrificial material like hardboard or MDF pinned or glued to the bench, but check that any pins are punched well below the surface.
Tip
After use, double sided tape can usually be rolled off with your thumb, but check the effects of it on a piece of scrap if you are using veneered boards and make sure any invisible traces of adhesive are removed before staining and polishing.
Materials and their preparation
You can rout a range of materials including non-ferrous metals and most plastics, but with wood based materials some machine much better than others. Unfortunately, there are no hard and fast rules here, a lot depends on the type of cut you are trying to make and you also have to consider other factors like cutter condition, feed speed and grain direction. You cannot beat hard earned experience in assessing how a particular piece will work, so experiment with different cutter and feed speeds, as well as varying the depth and direction of cut.

Surprisingly, softwoods tend to be more difficult to work with a router and require the cutters to be in tip top condition. Because these timbers are relatively soft, it is also tempting to feed the router too quickly which causes feathering, or leaves the edges of the cut fuzzy. What’s more, softwood tends to be full of resin which can build up on the cutters and bearings, causing marking or burning.

Hardwoods on the other hand tend to cut more cleanly even if the cutter is not as sharp as it should be. The moisture content of the timber has a bearing on cutting performance as well. You will get nice clean shavings off a piece of air-dried material, whereas kiln-dried stock will probably be more dusty. Some hardwoods contain ingrown deposits of gritty minerals that wreak havoc even on TCT cutters. However, on hardwoods the differences between side and end grain is less marked and you will probably get a more uniform finish with less scorching.

MDF is a wonderfully consistent material to rout provided you take suitable precautions with the dust. Sharp TCT cutters will leave a really clean finish but they will need much more frequent re-sharpening than on timber as MDF is very abrasive.

Plywood has an even more destructive effect on cutters, particularly if you make long cuts when the alternating layers of side and end grain will actually wear grooves even on TCT cutters. So keep varying the depth of the cutter to spread the load if you have to use ply, but also be prepared for regular cutter replacement.

Chipboard is another easily routed material but it does have a similar blunting effect like MDF, as it often contains tiny particles of metal and soil which spark when you hit them. Routing intricate profiles in chipboard is virtually impossible and this material has more or less been superseded by MDF. Faced chipboard though, is still very popular and the thin laminates on this are very difficult to cut cleanly using a saw. However, cutting it to the final size using a router will leave a perfect finish on both faces.
Preparation
With any woodworking project it is essential that the material is first properly prepared, particularly if you are using timber rather than man-made boards. You will never be able to work accurately if the material is not finished true and square.
Although sawn timber in its rough state is much cheaper to buy than prepared stock, you must then have the capability to cut and plane each piece to its precise size. It may be possible to do this by hand for small sections, but you will get more consistent results by using powered machinery.
Even buying ‘planed all round’ (PAR) material from a timber merchant does not necessarily guarantee that what you get is perfect, and you may still need to cut or plane it to particular dimensions or true up the ends.


If you already have a small workshop, the most essential machines for this initial preparation work are a circular saw and planer thicknesser. Couple these with a good quality chop saw and you should be able to produce perfect stock for any routing project. However, the more time you spend at the preparation stage, the better the finished result will be.
If you are on a limited budget, or don’t have the space for any machinery, some merchants offer a service preparing timber to cutting lists. However, this is a very labour intensive process and is therefore costly and they will not necessarily take the same sort of care in selecting suitable pieces that you would. The results are therefore often rather disappointing and your project gets off to a bad start.
For example, material that is planed too quickly will be left with pronounced ridges that will be faithfully reproduced by any form of bearing cutter. Edges that aren’t properly square will register differently

When you fit them into a jig, joints just won’t fit if the original timber preparation is not perfect. Don’t try and blame any deficiencies here on the router, accuracy can only be achieved if the material is properly prepared in the first place.
Without doubt, preparing your own material is the best answer, and whether you use hand tools or machinery it is essential to follow traditional woodworking practices. On solid timber, mark out the face side and edge and then work off these as reference surfaces for all subsequent operations.

Grain direction is one of the most important considerations when you are working with a revolving cutter in a router. So take both the grain direction and figure into account before starting any preparation. Most routing operations are carried in the same way, based on the principle that the feed direction is usually against the direction of rotation of the cutter.
So if the grain is lying towards the direction of cut, the fibres will be bent back and broken off leaving a rough finish.

However, if they lie with the feed direction, the fibres will stay flat and cut cleanly. Think of the effect of brushing a dog’s coat if you want an analogy. Brush it the wrong way and it all stands up on end, but it remains smooth if you work the other way.
This business of the grain direction is particularly relevant when you are working with curved surfaces, where changes in grain direction are inevitable and totally unavoidable. In these situations, you may be restricted to a damage limitation exercise, but refer to the section on ‘backcutting’ in ‘Handling and feeding the router’ later in this chapter.

Where possible you should always avoid routing through knots, especially if they are dead or loose ones as they may be thrown out by the action of the cutter.
If cutting through an obviously loose knot is unavoidable, run in a small amount of thin superglue to stabilise it before you make the cut

The grain direction may sometimes be dictated by the way you need to orientate the figuring for a particular effect, for example in creating handed panels or matching pieces. This visual orientation may not always be the best from a machining point of view and you sometimes have to strike a balance between the two.
But if you think ahead a little you can build in some measures at the material preparation stage to overcome these potential problems.

For instance, it may help to leave a particular piece slightly over-length to give some infeed or outfeed run-on if you think the grain is such that it will tear at either end of the cut. Similarly, if there are a lot of small components to machine, plan the cutting order so that you are always working with as bigger section as possible.
E.g. making narrow mouldings by routing the edge of a wide board and then ripping it off before repeating the process.
Other tools required
Accuracy at all stages of the work is the key to using the router successfully. So even when your material is prepared properly you will still need a few simple measuring and marking tools in addition to the router and its basic accessories.
Any form of woodworking is limited by the dimensional stability of the material itself, as well as the ability to cut it accurately. Do not be over concerned about absolute precision though, as woodworking is different to engineering and a tolerance of plus or minus 1mm is normally acceptable for most jobs. It is usually more important to have matching components all exactly the same size, rather than having them a precise size.
Although many discrepancies are visible to the naked eye it is sometimes more reliable to use your sense of feel to check for any errors. Your fingertips are incredibly sensitive and can detect differences of as little as .025 mm, so get in the habit of using them.

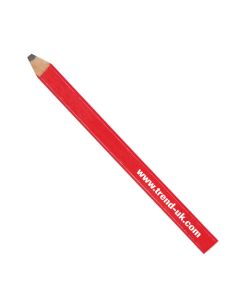
Pencils can be notoriously inaccurate as a means of marking and need to be keptreally sharp or the line becomes imprecise.
A good marking knife is more reliable, if the cut line is critical. Scribing a line with a knife will often help to minimise spelching on cross grain cuts as well.

A long steel tape measure may be fine for sizing up your pieces of wood, but it is useless for really accurate measuring.
For this, you will need a short steel rule link tt productwith clear graduations. Although this can be used for jobs like measuring the projection of the cutter, it is often more accurate to measure the result of the cut, as they are not necessarily the same thing. A slight buckle or twist in the timber or router baseplate can introduce inaccuracies that are not clear until you actually make the cut.

A good quality square is essential, linkthe steel machinist’s pattern being better than the bulky woodworker’s type, but a combination square is another alternative as this will give you 45° angles as well.
This is one tool that does need to be of really good quality, as a less than perfect square is useless, so buy a good one and look after it.


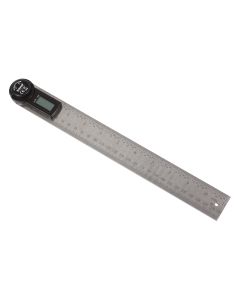
A sliding bevel and protractor is needed for all the intermediate angles. These are often combined into a single tool or digital angle rules are now available providing a digital display of the angle created.
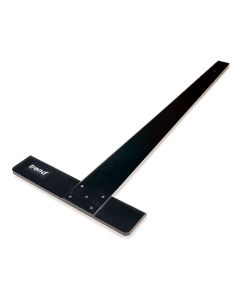
A straightedge is required not only for marking out and checking flatness, but also as a guide for straight cuts.
A 1m length provides the best compromise between convenience and function. Supplement this with a good quality Tee square link?and you should have all the basic marking out operations covered.