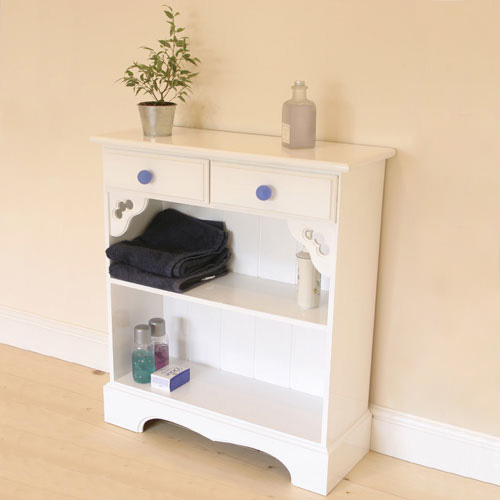
Bathroom Shelf Unit Routing Project
A mix of traditional and modern styles have been used to create this very attractive shelving unit.
This is another of my quick MDF creations, jobs that use very little in the way of material, can be completed in a day and yet sell for a reasonable price.
This one was a commission for a small bathroom fitted out in a mix of traditional and modern styles, but it could easily be adapted into a bookcase for the living room or even for some extra storage in the kitchen.
In this case though, the bathroom was part of a conversion from a church, hence the slight ecclesiastical reminder in the form of the shaped shelf brackets.
However the one real problem of working with MDF is dealing with the dust and it is important to take adequate precautions during any machining operations. I use a dust mask as a matter of course, but also connect as many of the power tools as possible to a vacuum extractor. The router in particular generates huge clouds of powder fine dust and if you can collect this at source the mess is reduced dramatically.
Step 1 - Prepare MDF & Assemble Carcass
Buying full sheets of MDF form a builder's merchant is still the most economical route, but they do take some managing, so buy cut pieces from a DIY store if you cannot handle a full 8 x 4 sheet, though pro rata you will have to pay a lot more this way.
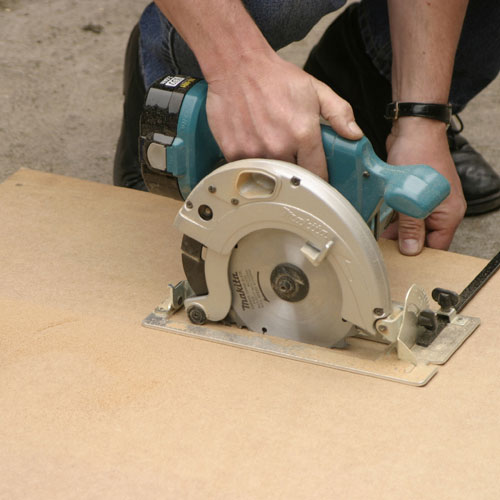
Even half sheets are still quite bulky so the initial breaking down is best carried out using a power saw with the sheet resting on skids on the floor, it is difficult to cut accurately with these saws though, so cut each piece a little oversize at this stage to allow for cleaning up later.
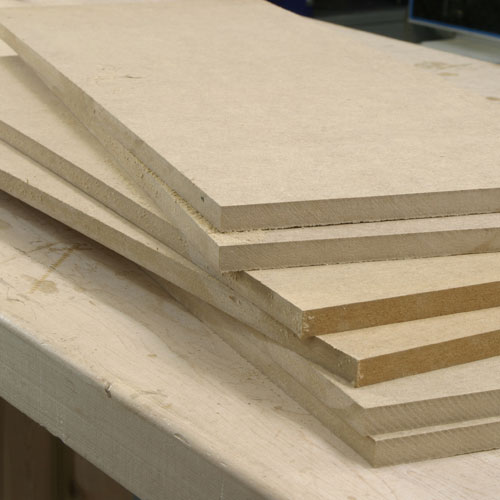
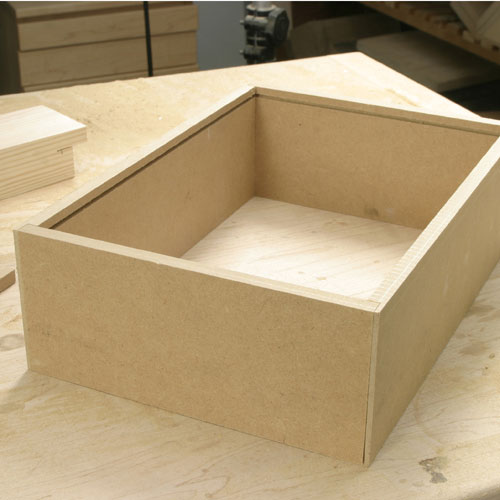
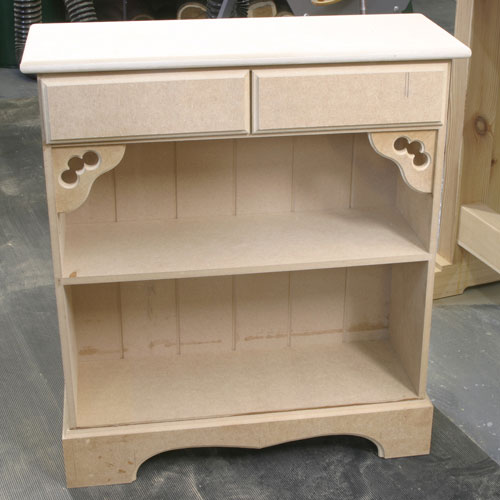
It is surprising how quickly the sheet disappears when you are ripping off 9" widths, the overall dimensions of this project meant that I had to cut six pieces for the main carcase and shelves, This is all in 12mm material which is not over strong on its own, but the rigidity builds up as the pieces are assembled and particularly when you fit in the back. The reduced thickness of each piece also means that you cannot screw the structure together so instead have to rely on tight housing joints and glue, no problem with a router!

Try and machine matching components together so they end up identical in size. If you do them individually there are inevitably some slight variations which only become apparent as the thing is assembled. I use quick action clamps to hold the pieces as one.
You can then plane it up as if it is a single board. A hand power plane with its TCT knives is probably a better bet for MDF but is undoubtedly more difficult to control on long narrow edges
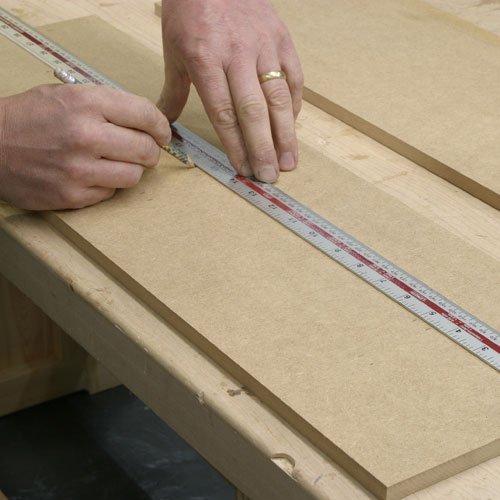
Start by marking out for the position of the shelves on the two sides of the carcase. A steel rule is much easier to use and more accurate for this rather than trying to manage with a tape measure. Even on a relatively simple projects such as this, measuring and marking accurately is essential, don´t think that accuracy is just confined to fine the cabinet making.
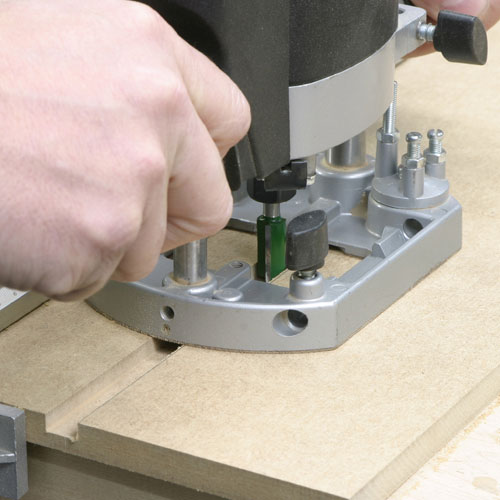
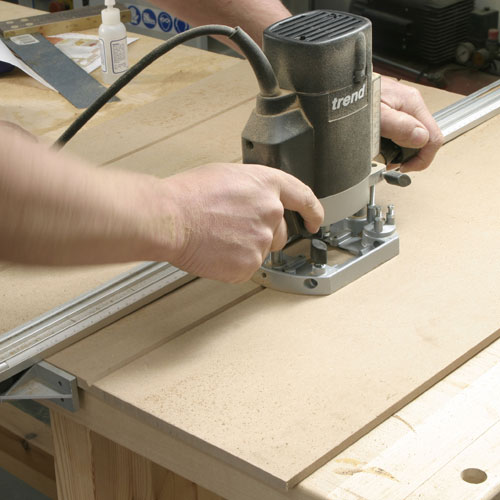
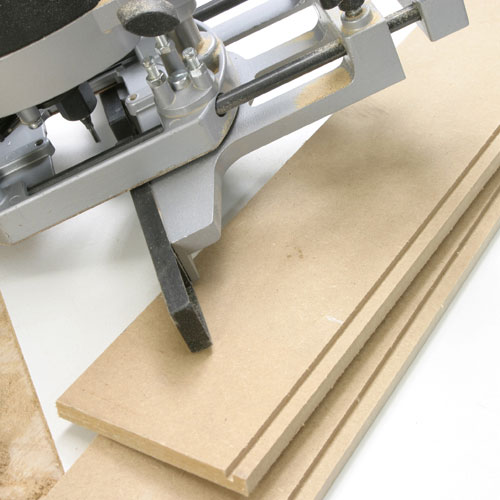
The housings for the shelves are cut with the appropriate bit in the router, and the best way to get the spacing the same on either side in to clamp the straightedge across both boards and rout them as one.

I find my Trend clamp guide invaluable here as it performs both functions at once. However make sure you run the router the right way, always feeding it against the direction of rotation of the cutter so that it is pulled against the straightedge and doesn´t wander off.
Once you have cut the first groove across both boards use a small offcut of the shelf material to lock them together while you reposition for the other grooves.
Repeat the procedure for each shelf groove and also housing for the top off the carcase.
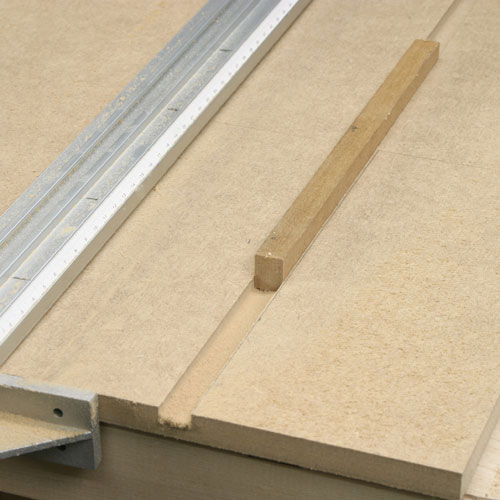
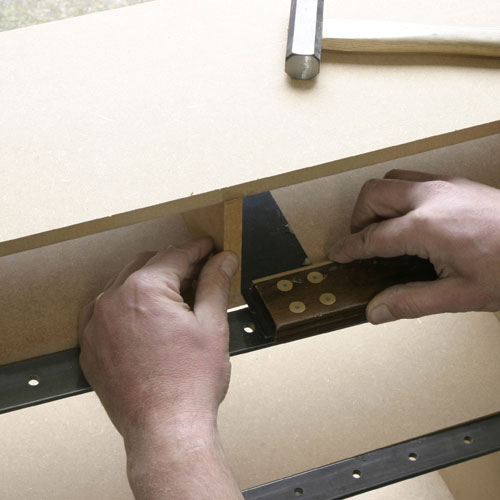
Also, you need to put in a groove to take the back, I hesitated for sometime whether to put in a groove or a rebate here. The groove is always better as it locks the whole structure together more firmly when you put in the back, but the small section of MDF left on the outside of the groove is very brittle and can easily break away. On reflection I would probably have been better cutting a rebate, as I only just got away with sliding the back in without breaking off any of the groove. Also remember that the sides are handed, so put the groove in the right place on each.
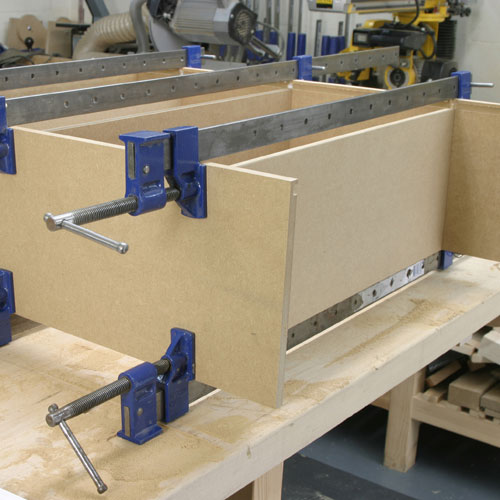
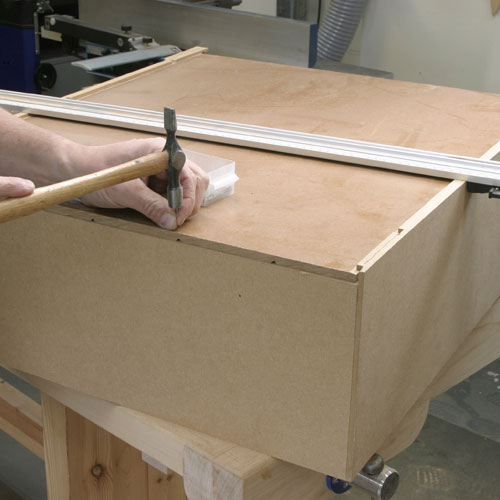
Glue up the carcase using more glue than perhaps you would normally use as MDF is very absorbent. If you have them, use plenty of sash cramps to hold it together, but beware of over tightening them with this thin section material as it can distort alarmingly.
If you have cut the housings the right size in the first place it is only the question of holding the joints together rather than pulling them up tight.
Step 2 - Plinth Shaping, Assembly & Backboard
Next we can cut and shape the plinth and attach a backboard to the cupboard carcass
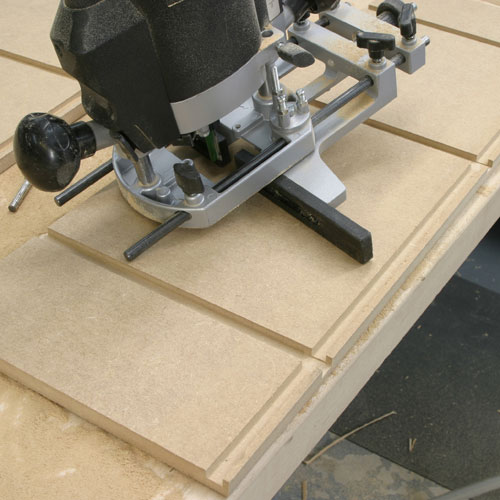
While you are waiting for this to set, make a start on some of the other bits. Run a simple edge mould along the plinth section whilst it is still in one length.
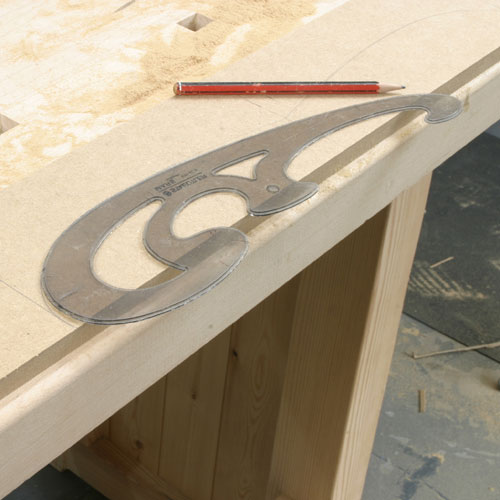
Don´t use a very elaborate cuts on MDF as all the machined surfaces end up becoming rougher when you start applying any sort of finish, keep them simple so they can be sanded easily. Give the front plinth a little decorative shaping, experiment with a French curve until you get a shape you like the look of. This can be cut out using a jigsaw with a fine blade to minimize any tearing.
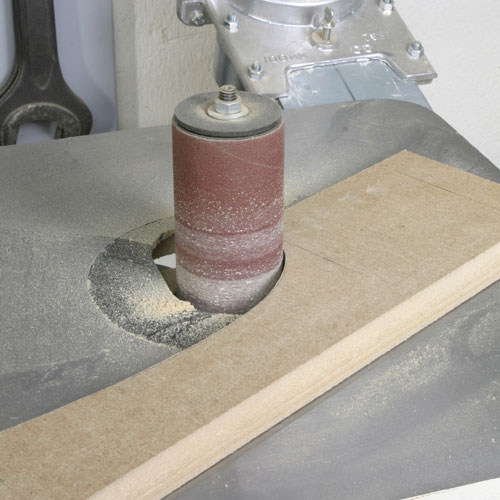
MDF is relatively soft and you can and sand the cut surface, but a drum sander makes a superb job and you should be able to get the curve really clean.

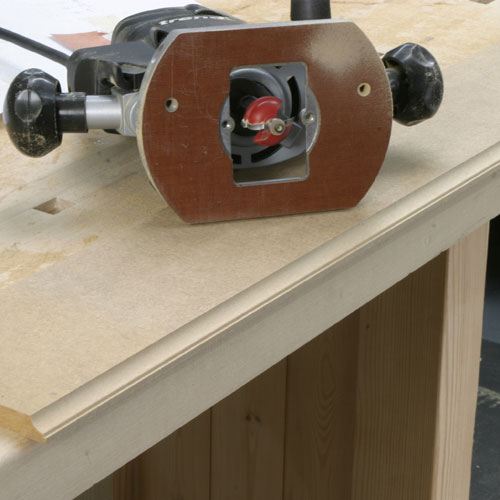
Only when it is properly smooth can you run a bearing guided cutter around the shape to give a little extra detail. If you do this without firstly preparing the edge properly, any irregularities are telegraphed into the mould and the finished result looks terrible.
The back in just a single sheet of 10mm MDF with a series of V grooves cut and it to imitate match boarding.
Space the grooves evenly and don´t go too deep or the back becomes a very weak. Slide it into the grooves in the carcass sides and just pin it in place.
Step 3 - Drawer Construction
Moving onto the two drawer boxes, created using a drawer lock joint cut.
The drawer sides are prepared next. It is difficult to cut any form of joint in MDF as it is so brittle, so I just half lap and glue the corners. You also need to put in a groove for the drawer bottom using an appropriate cutter in the router. For utility furniture like this I prefer to use melamine faced hardboard as it is easily wipeable. It only requires 1/8" groove, but be careful using these very fine cutters as they are easily snapped off. It is always better to make several shallow passes than trying to do it in one big one.
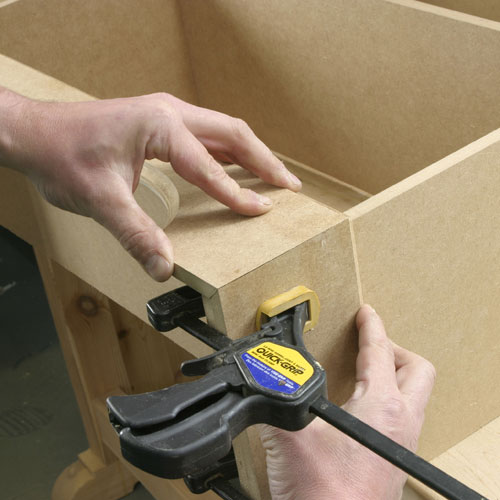
The divider between the two drawers is just glued in place, but take your time to make sure that it is dead central and square in both directions, or you will find it difficult to fit the drawers properly later.

The half lap joints for the drawers are again cut with a router using the side fence, but working across the end of narrow section is like this can be quite awkward.
Slide the plastic sub fences together so they are as close as possible without fouling on the cutter. At least you then have as much support as possible but if you are still struggling to guide the router, clamp a piece of scrap in line with the drawer front and cut through onto this. Make a trial assembly of the drawer to check the dimensions and make sure you it will fit in the recesses of the carcase.
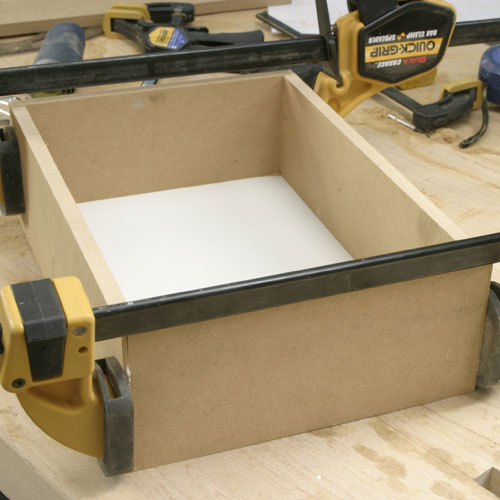
If everything is OK glue it together with the base in place and clamp it firmly. Provided you have cut the baseboard square and it fits snugly in the grooves the drawer should pull up square, but do just measure the diagonals to make sure.
Once the carcase is dry, the plinth can be fixed in place. Cut the pieces a bit oversize initially so you can trim the mitres for a perfect fit, I actually use superglue designed for fitting cornices for this, as it allows you to hold the mitre together perfectly whilst it dries, which only takes a few seconds.
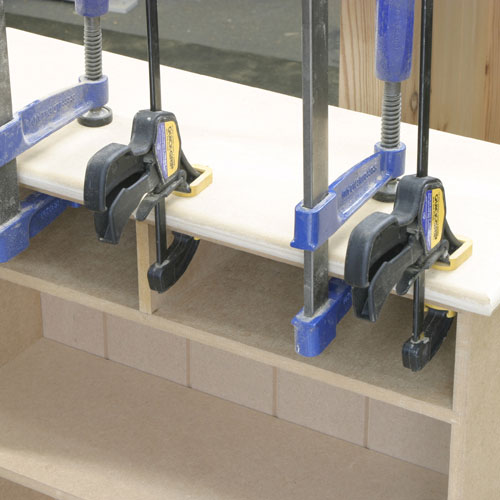
The top is a piece of 18mm MDF with a radius machined on the front and sides, and again this just glues and clamps in place, However be careful that it doesn´t slide about as you clamp up and check that the overhang is even before you leave it to finally set.
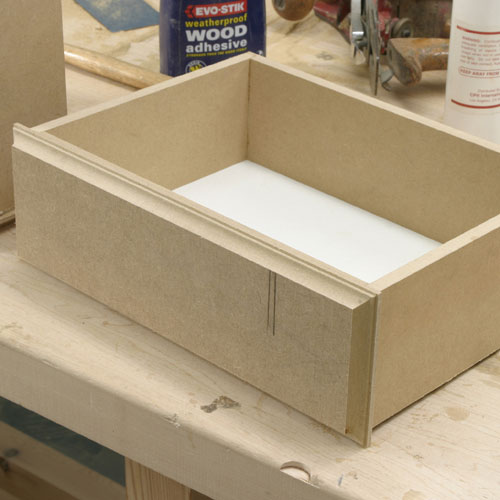
The same technique is used for the drawer fronts which are 12mm MDF routed with the same design is the plinth, and then just planted onto the front of the drawer.
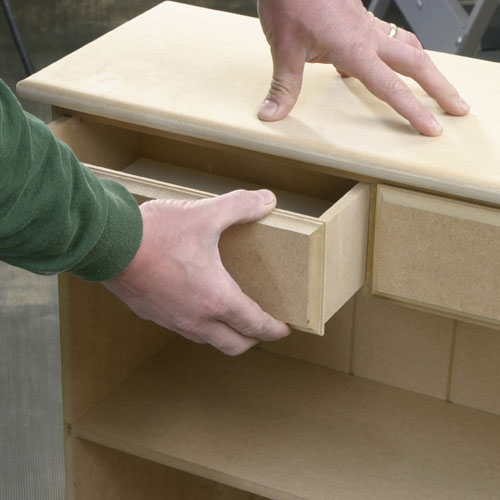
The drawers may need easing slightly with some light sanding to make them slide freely in the recesses. Remember that the unit is going to be painted, so it is far better to have them a fraction loose at this stage to allow for the thickness of the paint.
Step 4 - Finishing Touches
The final decoration is in the form of some corner brackets that adds just a touch of detail to reflect the church theme.
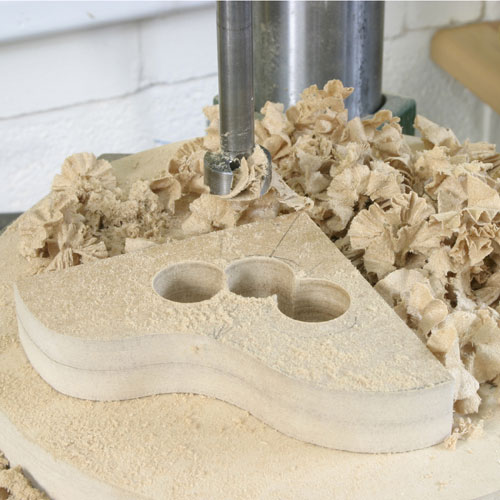
Stick two pieces of 10mm MDF together with double-sided tape and cut out the shape of the brackets. To make them look a bit lighter I drilled three overlapping 1¨ diameter holes.
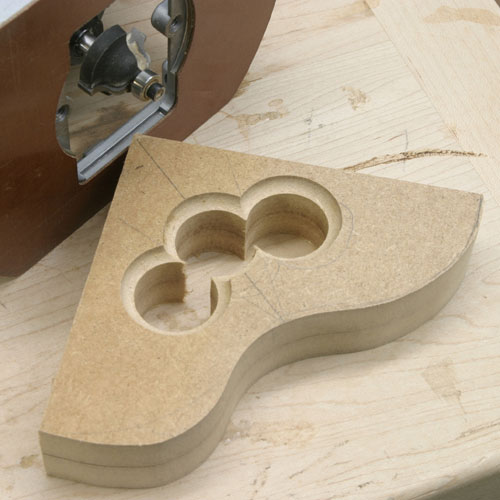
Then using the lower half of a small Roman ogee bit, run round the inside all the holes to complete the detail.
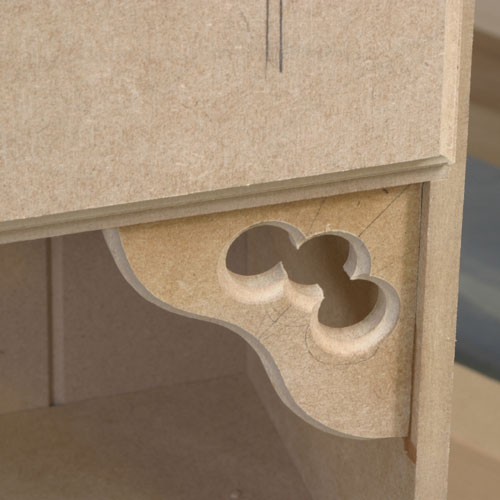
Finally fix them in place with a more superglue, setting them back slightly from the edge of the carcase to form a shadow line.
The unit is now complete and ready for finishing, MDF is always difficult to finish well, particularly along any machined edges. These always tend to rough up along the molded edges.
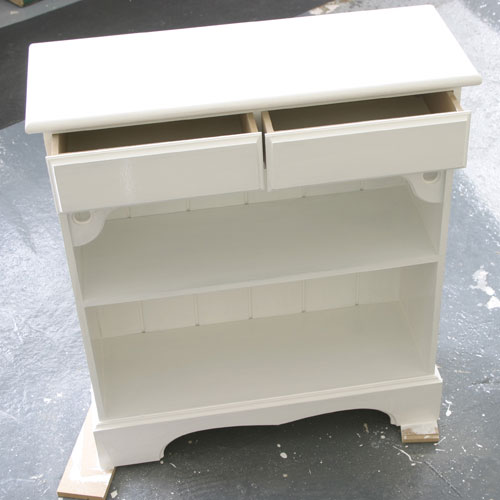
I have used various techniques over the years to try and overcome these problems, but now usually start with a coat of cellulose sanding sealer. This stabilizes the surface and can be flatted down really smooth before applying whatever painted finish you prefer. I applied the coat of standard white undercoat and then two coats of white gloss. If you flat down between coats you will eventually get a very smooth finish.
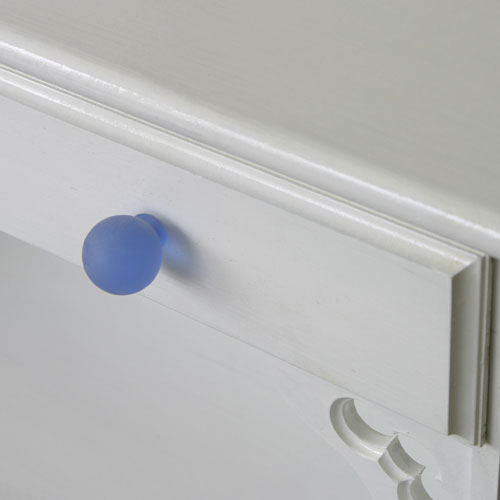
Finally fit some suitable knobs to the drawers, I found some run a nice glass ones in a local DIY store, these attaching with a single screw through from the back.
The completed Bathroom Shelf Unit
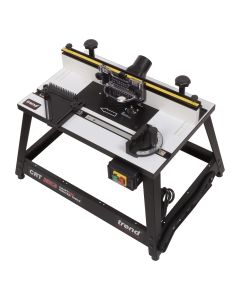
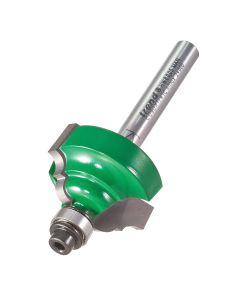
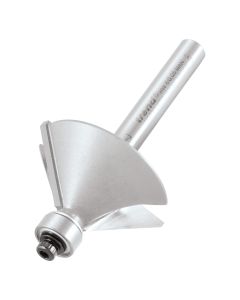
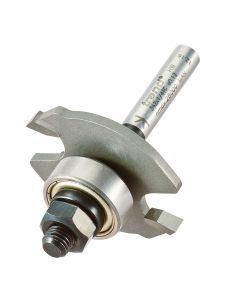
Related Products
Related Videos
Related Downloads
Related Test Reviews
Related Instructions

Document Download
Document Download
Document Download
Document Download
Document Download
Document Download
Related Files
Document Download
Document Download
Document Download
Document Download
Document Download