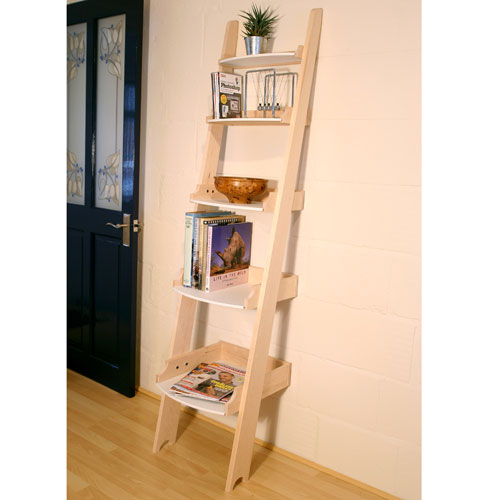
Ladder Shelves Routing Project
A modern style set of shelves in the design of a ladder, great for a room where space is at a premium.
This interesting little project came about after a request for some modern style shelving for a tiny loft conversion, but as usual with most commissions there were a couple of 'buts'. In this case it had to be cheap, (doesn´t it always), and also semi-knock down to allow it to be transported up a very narrow loft ladder. In fact it was the loft ladder that gave me the inspiration for the design, although I must admit to having seen several variations advertised in the back pages of the Sunday supplements.
However, this is my spin on the concept and although the framework is all completed in Maple to fit in with the modern decor, the shelves are painted MDF to minimize the cost. Contemporary furniture can often be made from a mixture of materials like this, you don´t have to spend a fortune on masses of solid timber and yet still get a stylish result.
Step 1 - Preparing and Cutting the Timber
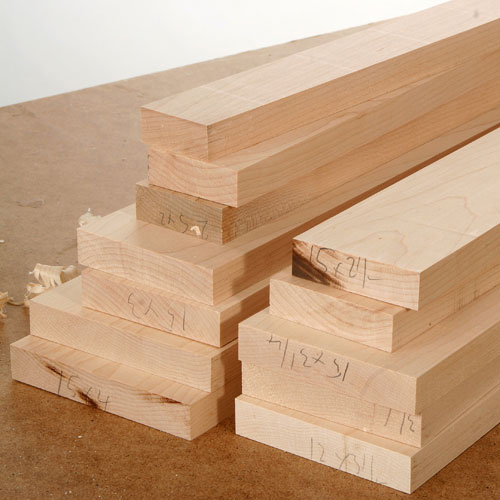
The Maple came as rough sawn 1 inch planks, so required a good deal of preparation before I could start.

The first step is always to trim off the very end of the boards to remove any grit that is likely to damage your planer knives.
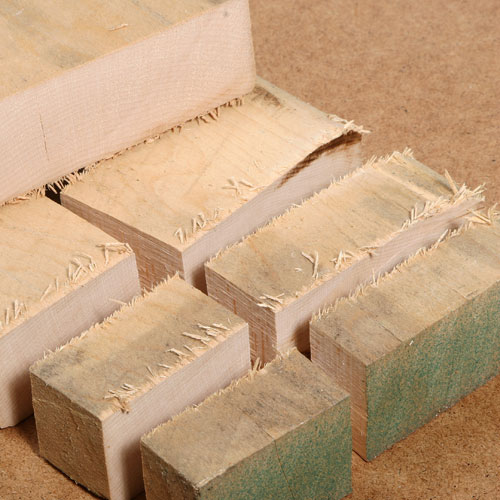
This first cut also allows you to check for end splits which may not be immediately obvious, but they do need to be removed before you start cutting pieces to length. In many cases the splits extend much further than you think, so give some thought as to what sizes you require to minimize potential waste here.
Although the boards appear to be clean and white maple suffers from several defects that can affect the appearance.
Although the two sides are relatively long, the rest of the pieces are all short, which allows you to cut out much more economically. It is often less wasteful to use the wide boards to produce several narrower pieces rather than cutting just one piece and leaving an unusable piece of scrap. Mark them all clearly as you cut and repeat the markings on the end as well, as those on the face will be removed as you start planing.
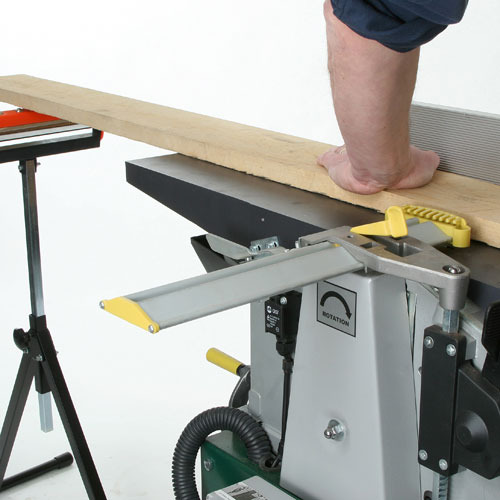
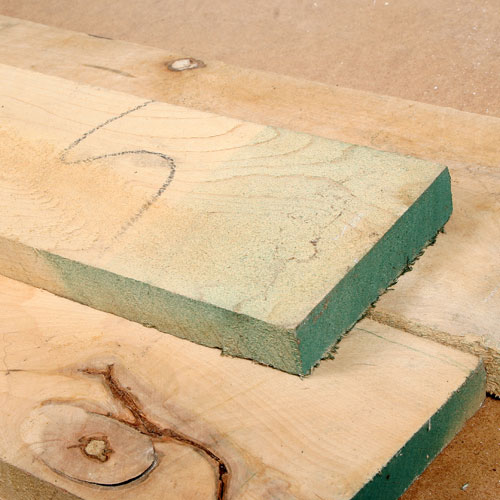
The two long sides are perhaps the most difficult to deal with, particularly if the timber is not straight in the first place. Start by surfacing one side keeping the concave surface of the board face down on the planer tables and using a roller stand to provide additional support.
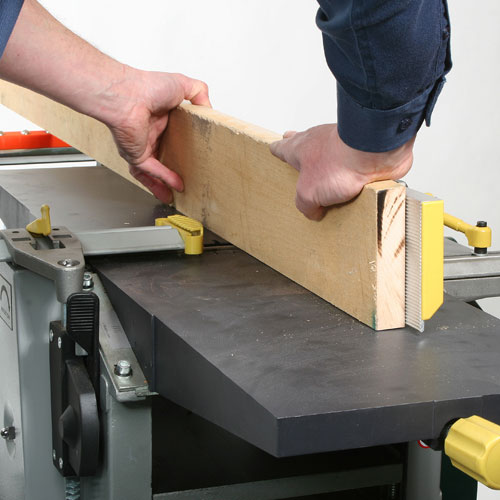
These roller stands are a real help if your planer tables are short and you are trying to handle long lengths on your own. Repeat the procedure with one edge, keeping the planed face tight up against the planer fence, and again making sure that the concave side is down on the table to try and straight and it.
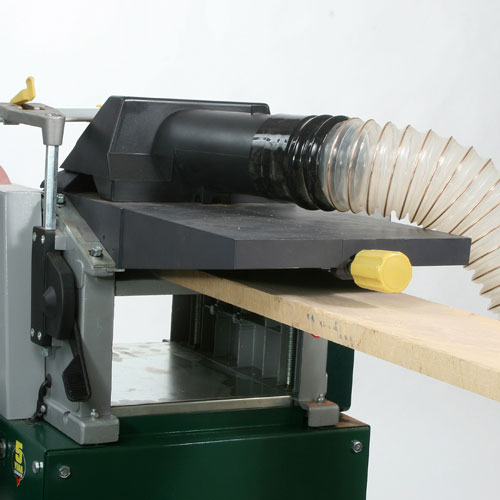
You may have to ignore the grain direction for these initial cuts, but any tearing can be corrected later during the thicknessing stage. With one flat face and edge as a reference surface, the thicknesser will make short work of cleaning up the other two, and should you leave you with a perfectly flat and straight board.
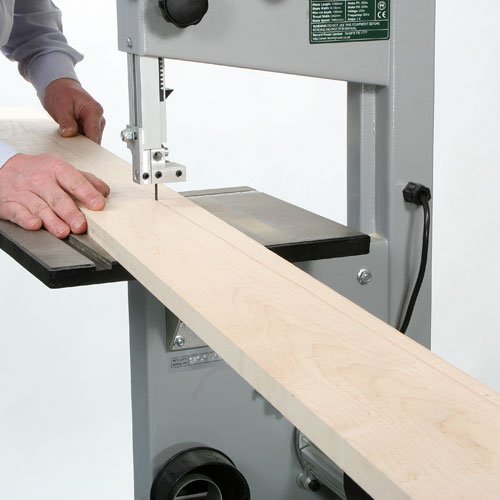
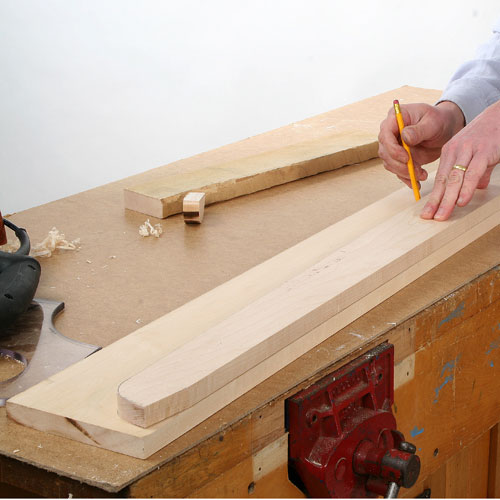
Mark out the taper on one of the sides and cut this out as accurately as possible on your bandsaw or circular saw. Once again the roller support makes it much easier to handle, particularly as you get near to the end of the cut.
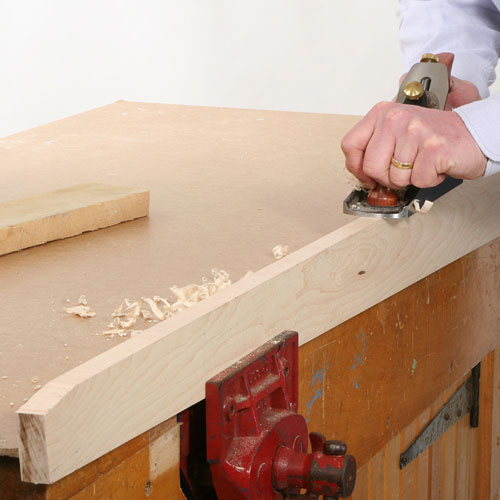
The tapered edge can be smoothed with a sharp hand plane, working downhill to minimize any tearing, which is often a problem with the interlocked grain of maple.
Step 2 - Cutting and Routing
The next stage involves cutting and routing the feet and draws of the ladder shelves.
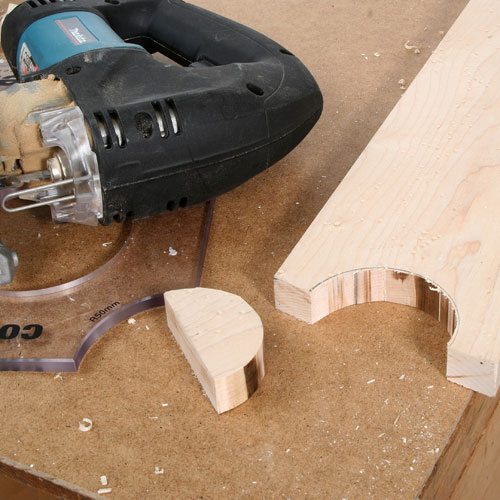
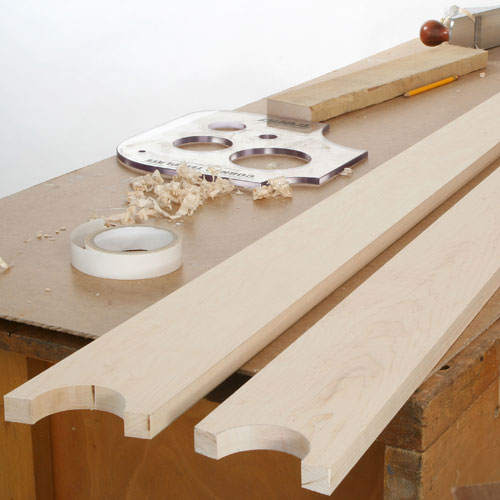
The semi-circles are cut out on the bottom end of the upright to form two distinct feet, which I thought would allow the unit to sit more firmly if the floor was uneven.
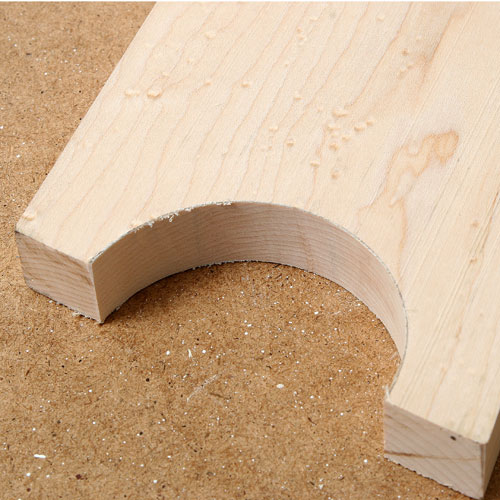
The initial shape is cut out with a jigsaw and then sanded with a bobbin sander in the pedestal drill to form a nice smooth curve.
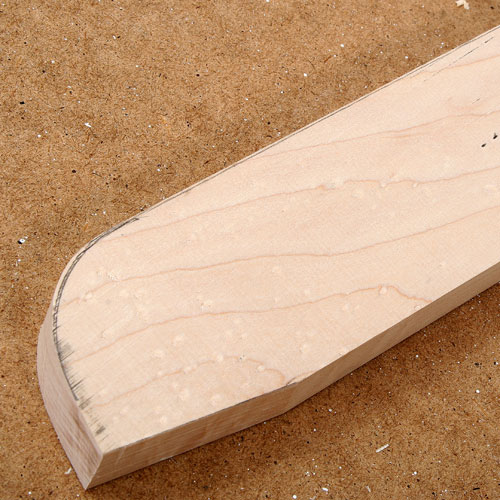
The top end of each upright is shaped with a radius at the front and an 80 degree chamfer on the back, to provide a bigger bearing surface where the unit sits against the wall.
Take your time with this first upright, getting a nice smooth profile and then use it as a template to mark out the second one. Although you could cut the shape in the same way as the first, this doesn´t always results in identical components, certainly not when I do it anyway! .
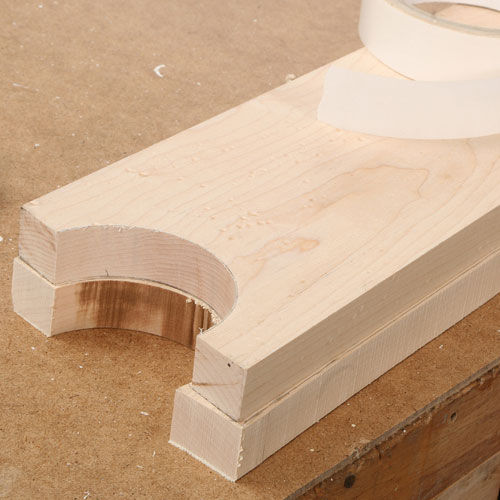
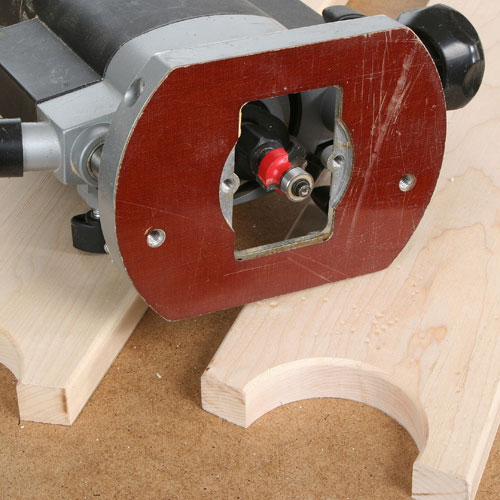
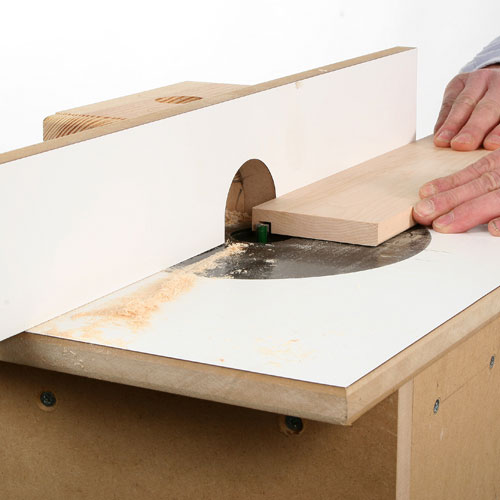
A better alternative is to roughly cut the second piece very slightly oversize and then stick the first onto it with some double-sided tape to act as a template before trimming the two to match using the router.
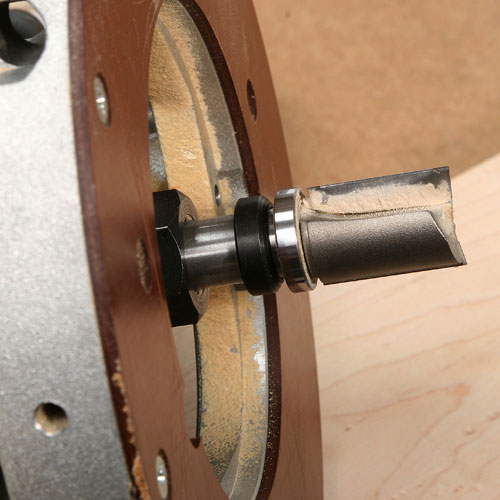
For this you will need a template bit, which is just a straight two flute cutter, with a top mounted bearing of exactly the same diameter.
With the two components firmly stuck together with tape, run the cutter all around the first one, which acts as a template. Provided you have left it only 1 or 2mm oversize, a single pass will cleanly trim off the excess and result in two identical components.
This is one of easiest ways of getting a perfect match particularly when the pieces are shaped, and provided the cutter is sharp, the router leaves a virtually planed finish. Just remember the finished profile is only as ever as could as your initial template.
I used a tiny rounding over bit in the router to soften all the edges on one face of each upright. This step is optional but personally I prefer the finished effect. Leave the inside edges perfectly square as a contrast.
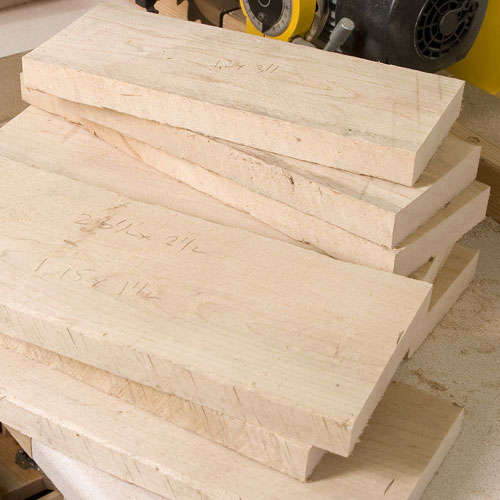
Then machine up all the separate pieces for the shelves. For a really neat finish I do all of the preparation, but leave the pieces slightly over thickness. Then if you cut them accurately to length before making the final thicknessing cuts this removes any spelching left by the crosscutting operation and the ends are perfectly clean.
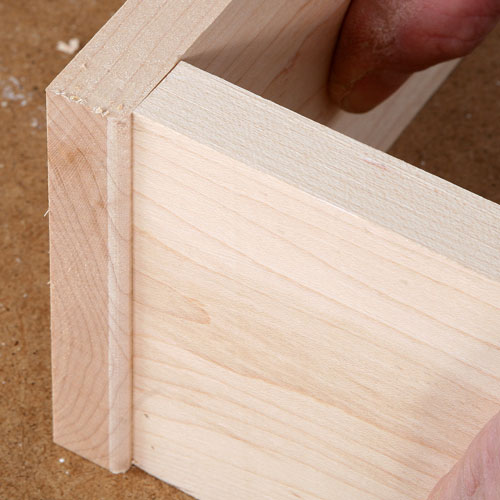
The three components for each shelf are simply butt jointed together, but here again you can make a feature of the joint by setting the sides slightly in from the end and radiusing the exposed corner with the router. Once again this takes away the rather crude appearance of a straightforward butt joint and makes the joint look like a designed feature rather than just an easy way out!
I also changed the design slightly at this stage by reducing the width of the sides relative to the back, which allowed me to radius the inside top edges of all the components before assembly.
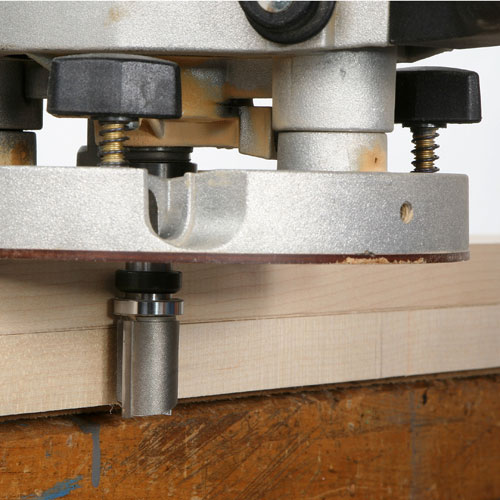
The groove for the 10mm MDF shelf is put in with the router, but this time the job is made easier if you can mount the router under the table and pass the sides over the top. Remember that the groove in the back needs to be stopped at either end or it will show in the finished job.
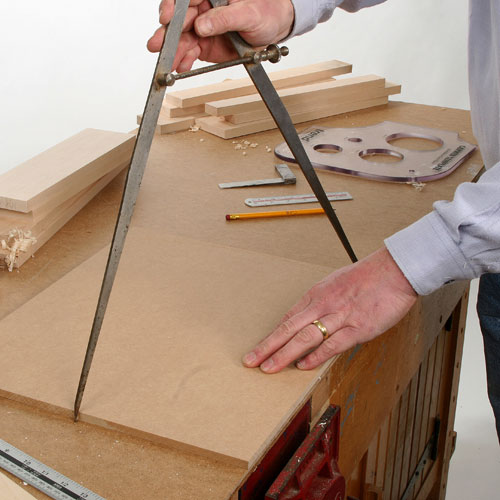
The front of the shelf is cut with a slight curve which I set out using a very large pair of dividers.
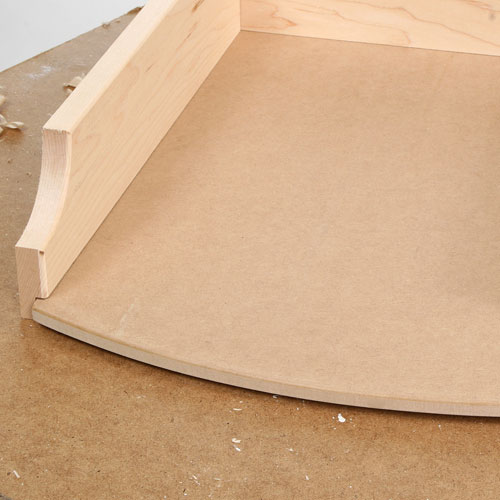
I knew they would come in handy one-day! The MDF is deliberately left slightly extended forward from each side, the curve having been cut on the bandsaw and then smoothed on the disc sander. The sides are also shaped with a radiused cut-out at the front, another jigsaw and bobbin sander job.
Step 3 - Painting and Assembly
Now, the final stages involve the contruction of the ladder shelves.
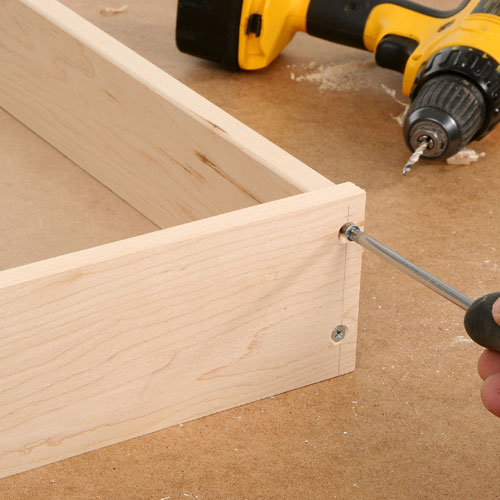
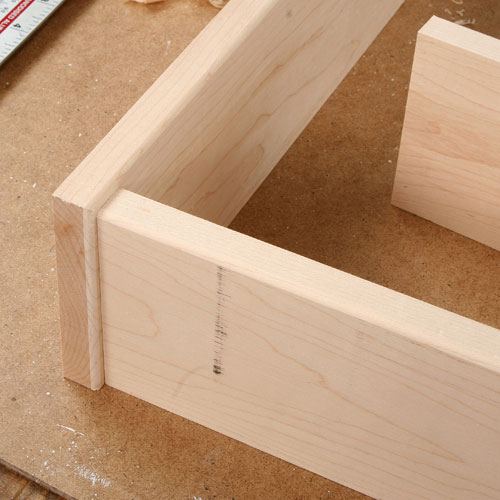
The sides are simply screwed to the back with the shelf temporarily in place to make sure everything lines up properly. Because the maple is so hard, make sure you drill the appropriate sized pilot holes for the screws, or there is a real danger of shearing them off or splitting the timber.
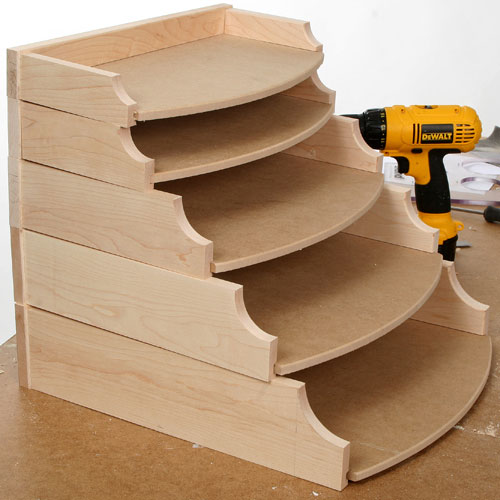
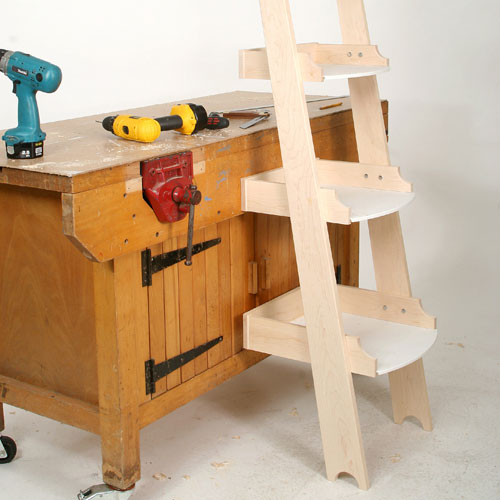
Repeat the same procedure for all of the other shelves. Notice how each one diminishes in width as well as height, as they get near the top.
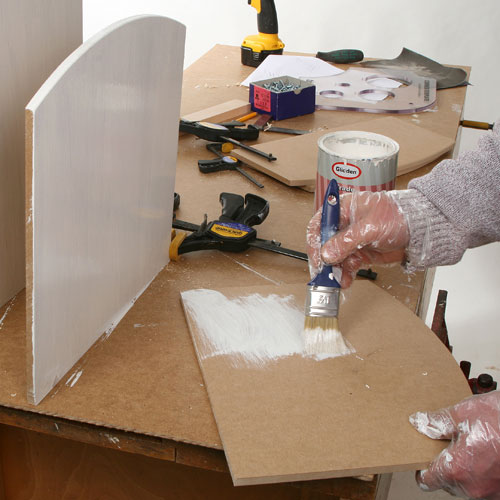
Although the sides of the shelves are fully assembled, I left the base loose so it can be slid out for painting. For this process I applied a single coat of wood primer and then two coats of eggshell finish, sanding down carefully between coats to remove the initial roughness that you always get when painting MDF. You can also take this opportunity to finish all the maple pieces as well; my preference here is for two coats of clear brushing lacquer.
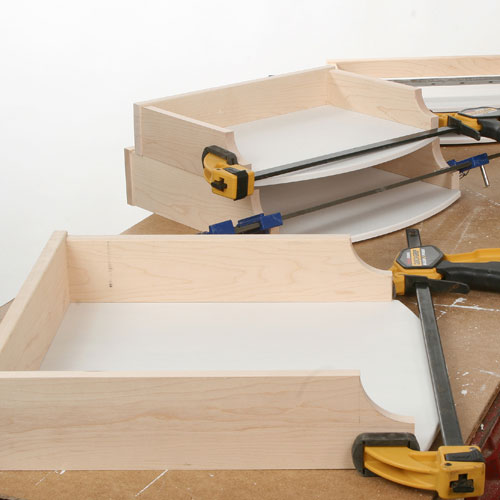
Once it is all dry, finish the assembly of the shelves by gluing in the painted bases and clamp firmly.
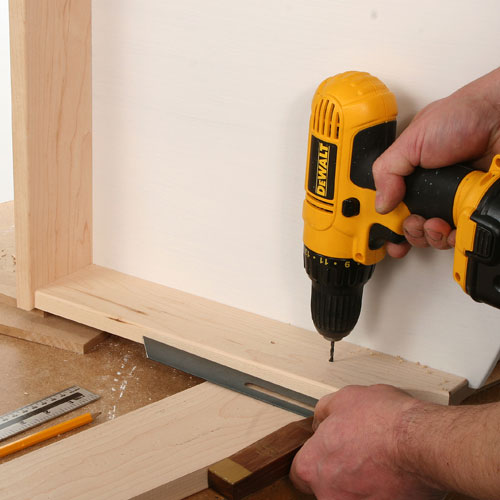
Attaching the shelves to the angled uprights requires some care if they are all to line up properly. Start by screwing the bottom shelf to one of the uprights using a sliding bevel to get it at the correct angle.
Step 4 - Finishing Touches and Presentation
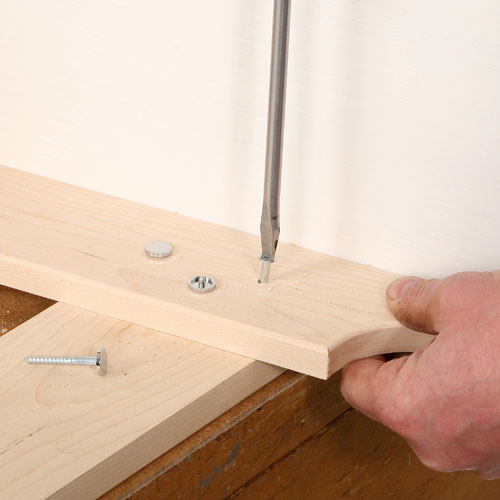
I used two mirror screws per shelf as the whole job was to retain its 'knockdown' capability, If you are making a more permanent job, a single screw and some glue would suffice.
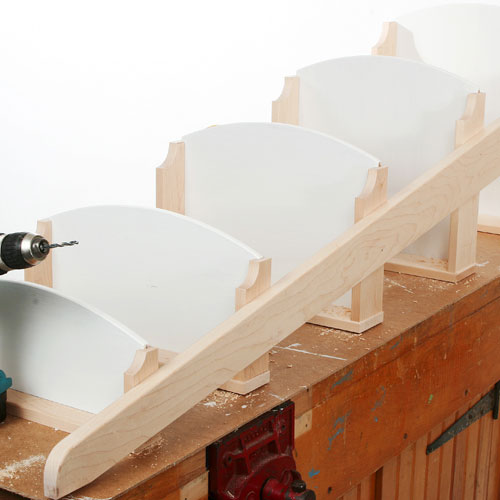
Once the first shelf is in place, you can lay the others out on the bench top to get the required spacing and to make sure they all line up down the back.
Then it is just a question of carefully screwing them in place and fitting the other upright to complete the unit.
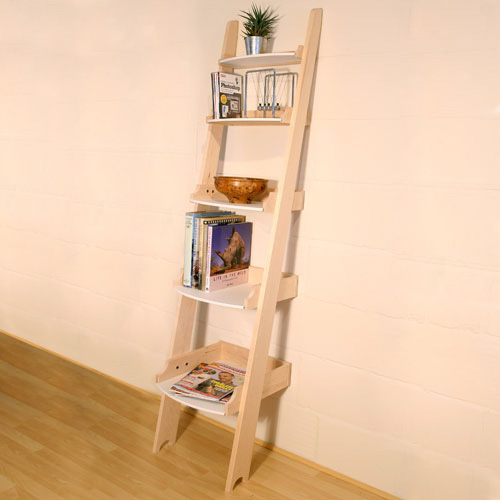
The completed Ladder Shelves Routing Project.