We use cookies to make your experience better. To comply with the new e-Privacy directive, we need to ask for your consent to set the cookies. Learn more.
MDF Bookcase with Drawers Routing Project
This useful little project, provides storage space that can be sited in any room in the house.
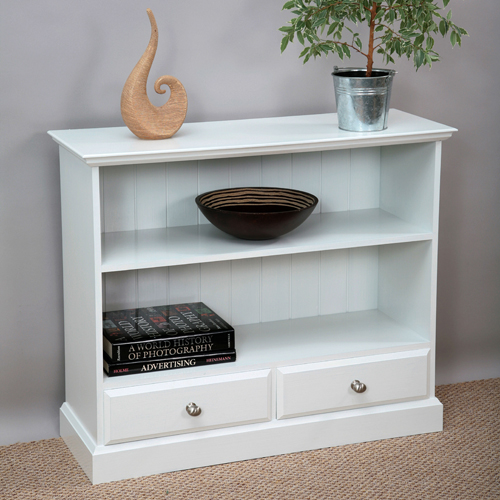
This is a very useful little project, as it provides some much-needed storage space that can be sited in any room in the house. For the construction I used MDF, a material that often receives a bad press, but which is nevertheless a superb product for painted projects like this. It is flat, stable, easy to machine and relatively cheap.
However there are a few factors to be aware of when you are using MDF. For a start it generates huge clouds of fine dust whenever you machine it, so always take suitable precautions against this hazard by wearing a dust mask, or preferably an air fed helmet. Secondly, although the flat surfaces will finish easily, any machined areas, particularly decorative detail, usually rough up as soon as you apply any form of paint. Finally, the standard MDF is very susceptible to changes in humidity and even storing it in a slightly damp atmosphere will cause the sheets to swell in thickness. Any edges in contact with a damp floor can be as much as 1 or 2 mm thicker than the rest of the sheet. Although not a visible defect this can cause very real problems when you are trying to produce accurately sized components or fitting them in grooves.
In my experience, many of these problems can be overcome by using the moisture resistant form of MDF, which is always coloured very pale green. The moisture resistant quality is achieved by using a different combination of resins during the manufacturing process, and although the result material is slightly more expensive it does have significant advantages. It rarely suffers from the swelling problems of the standard variety and any machined edges are much smoother and paint to a better finish without roughing up.
The material feels slightly waxy and cuts more cleanly, although it does appear to be slightly more susceptible to scorching when you are using the saw or router.
Step 1 - Preparing Timber and Marking the Shelf Position
Water resistant MDF is available in a variety of different thicknesses, but it is slightly more difficult to get hold of through the usual channels, so I tend to keep a stock of the full range of sizes, buying several sheets at a time to minimize the inevitable delivery charge.
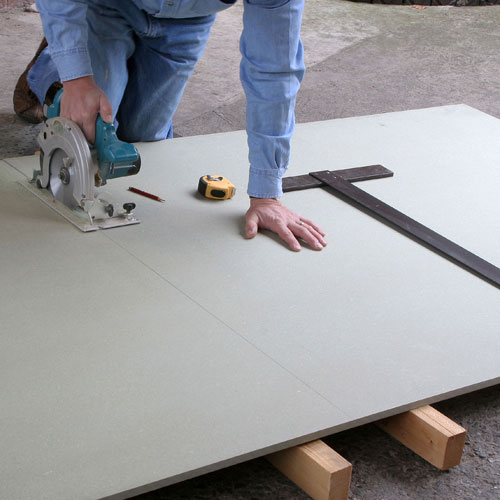
Full sized sheets are awkward to handle, so for the initial breakdown lay them flat on the floor on some bearers and use a portable circular saw to cut out all the components leaving them slightly oversize at this stage.
Clamp corresponding components together in the vice and then plane them to finished size to ensure they all end up exactly the same. Remember that the central shelves are narrower in width by the thickness of the back which will be rebated into the uprights in due course.
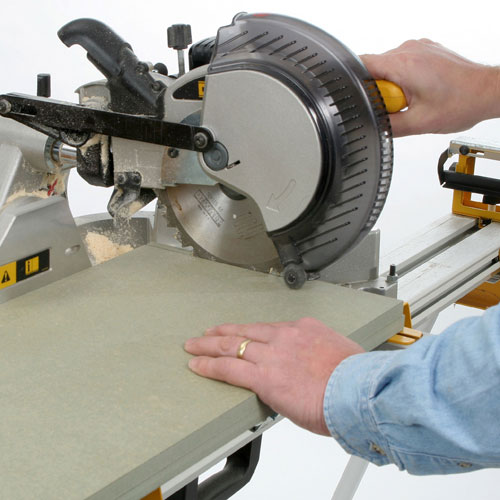
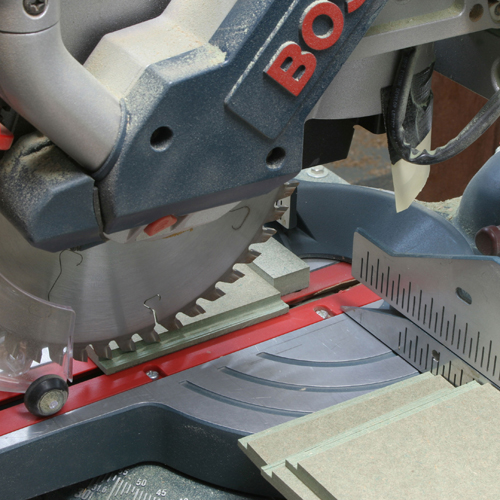
With the edges straight and square, crosscut all the pieces to exact length, a sliding head mitre saw is the perfect tool for this job.
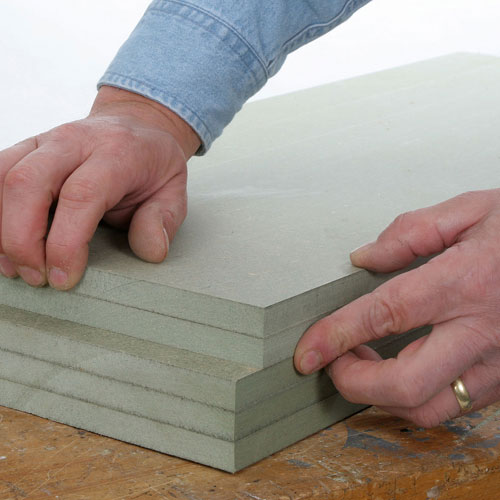
It is essential with any construction project that matching components really are identical, otherwise nothing will fit together properly when it comes to the assembly, so take your time to get them all spot on.
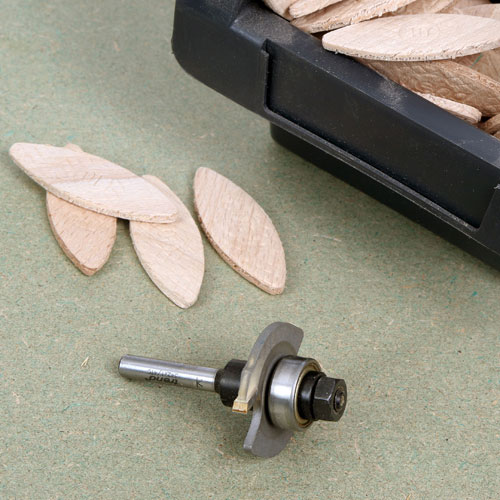
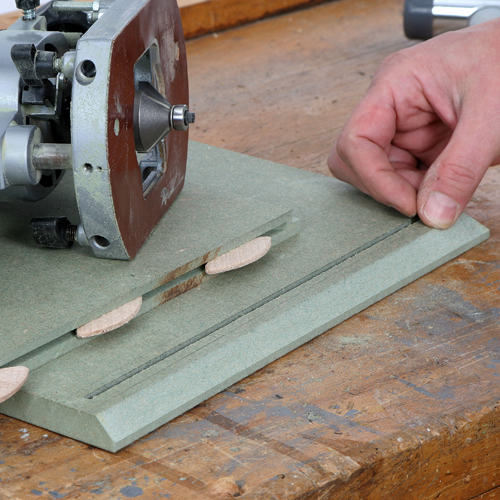
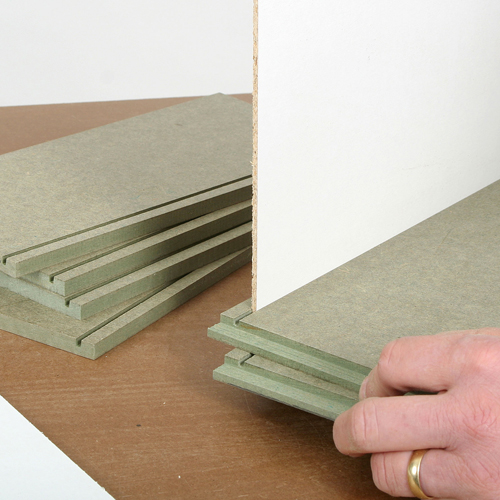
The easiest way to form the joints is by using biscuits and for this you can use either an independent biscuit jointer or a dedicated cutter in the router. Trend Ref. 342X1/4TC.
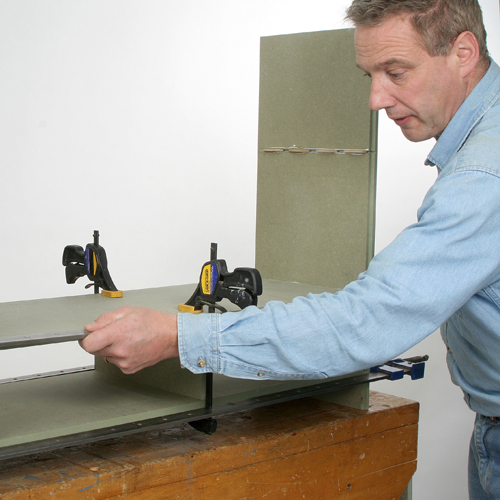
For this type of work I cut a slot right across the end of the board rather than cutting individual pockets for each biscuit. As well as being quicker, it also gives you a little more leeway when it comes to lining up when you put it all together. Cut these slots across the ends of the three horizontal shelves.
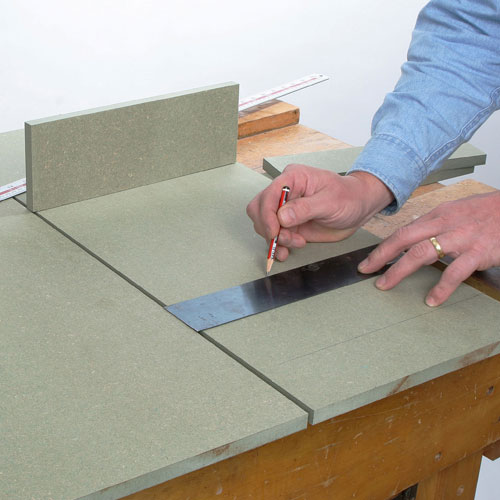
Now mark out the position of the shelves on the two upright sides, scribing the centre line clearly.
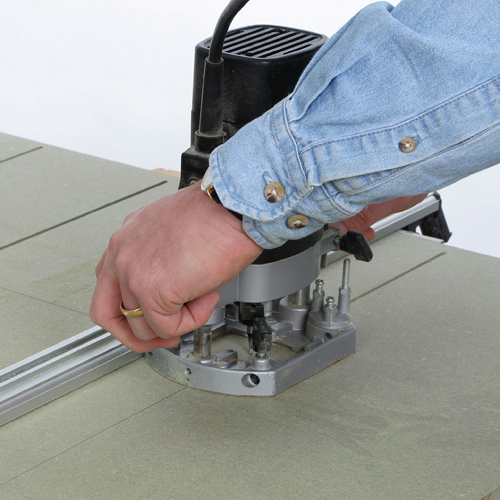
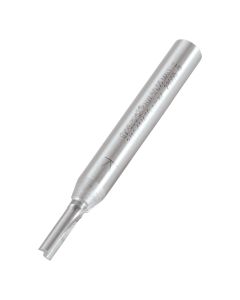
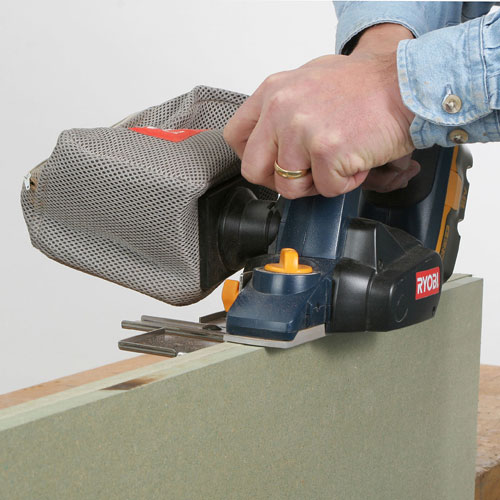
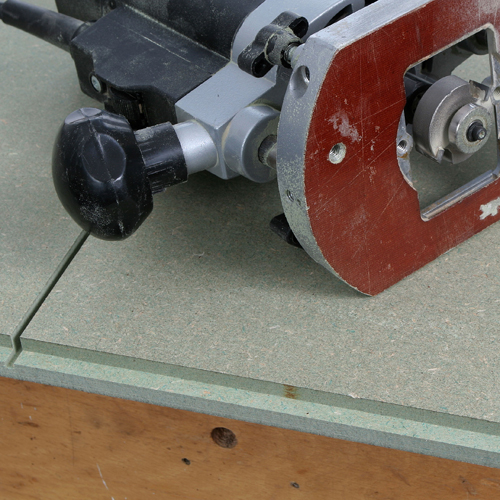
The matching slot in the uprights needs to be cut with a straight router bit, so clamp two uprights together and rout right the way across the two to make sure the slots line up perfectly. Trend Ref. 3/01X1/4TC or C002X1/4TC.
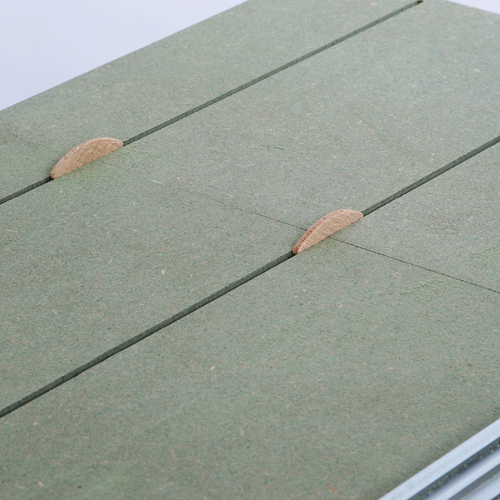
Once you have cut the first slot, put a biscuit across the join to keep the two components in line whilst you cut the remaining slots. Stop the slots clear of the two front edges on the uprights so that they do not show in the finished project.
Step 2 - Rebating the Sides and Trial Assembly
This stage involves ensuring everything you have built so far matches up correctly.
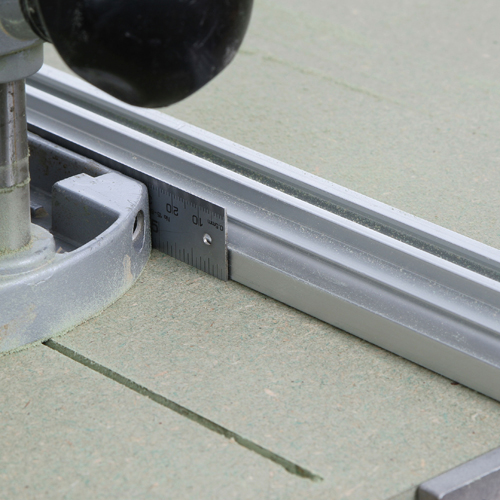
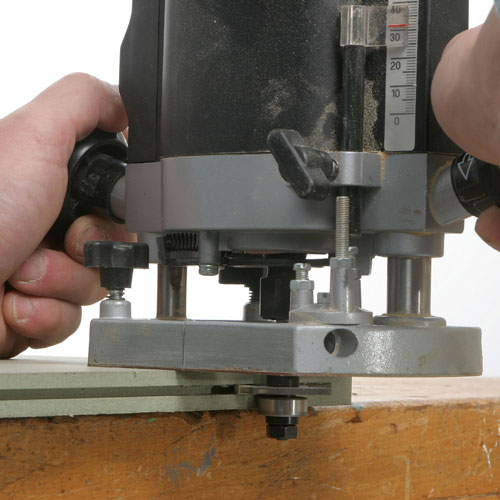
My router bit was a fraction too narrow for the width of the biscuits, but a really good tip here is to stick a temporary shim onto the side of the router base using double sided tape and then make a second cut, rather than trying to adjust the position of the straightedge. A thin steel rule is ideal for just this purpose!
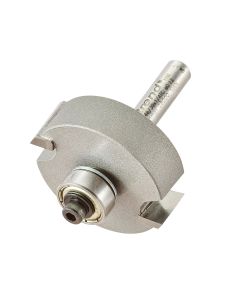
Next cut a rebate down the back inside edge of the sides to take the back, remembering that by now the sides are handed! Use a rebate cutter Trend Ref. 46/39x1/4TC or similar.
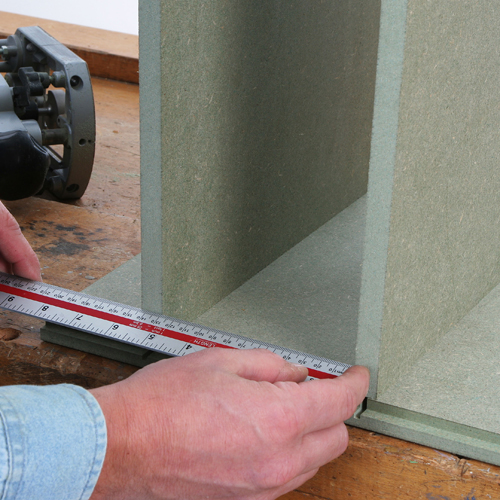
Temporarily fit the bottom two horizontal shelves in place and measure the width for the upright divider.

Cut this divider to exact size and machine biscuit slots in either side of it and also matching slots in the horizontal shelves.
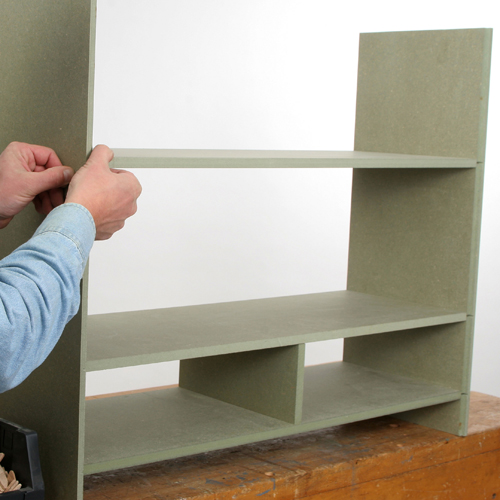
Make a trial assembly at this stage to make sure everything lines up. The biscuits should be tight enough to hold it all together temporarily.
Step 3 - Assembling the Bottom Shelves
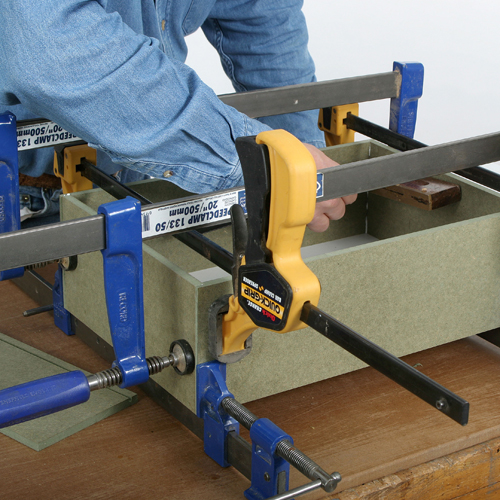
Once all the matching slots have been cut, you can now clamp, glue and assemble the carcase.
Cut matching slots in the top of the two uprights and on the underside of the top piece. As the finished top is made up from two separate pieces stuck on top of each other, it is better to machine the required profile on this lower piece.
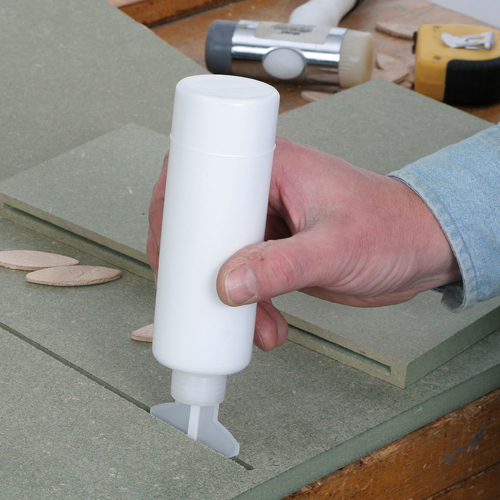
Now, you can start gluing it all together and the best tool for spreading the glue neatly into all these biscuit slots is one of the special shaped applicators which screws onto the top of the glue bottle.
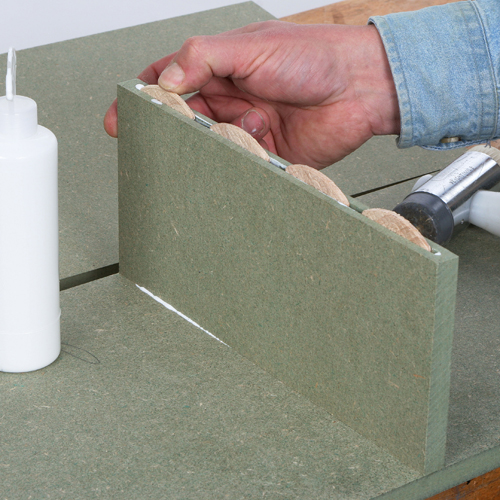
Start by gluing the middle upright divider in place, using a soft faced mallet to tap the biscuits well in. On MDF It is quite safe to wipe off any excess glue with a damp cloth, unlike solid hardwood where this procedure can cause staining problems later.
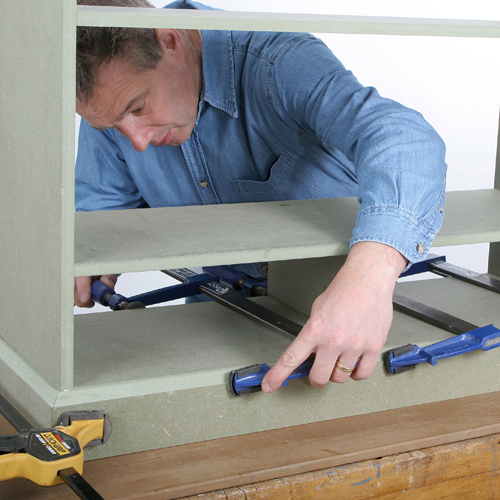
Assemble the bottom two shelves first and clamp these in place making sure the front edges line up perfectly.
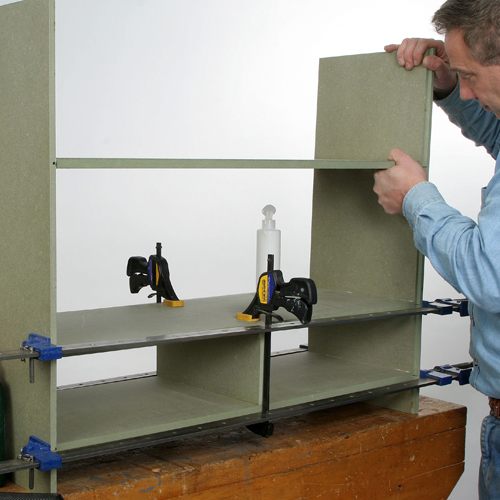
You should now be able to 'spring' the top shelf in place with the clamps still on the lower shelves. Using clamps like this makes the assembly job so much easier, as it all tries to fall apart if you have too many unsupported joints on the go at once.
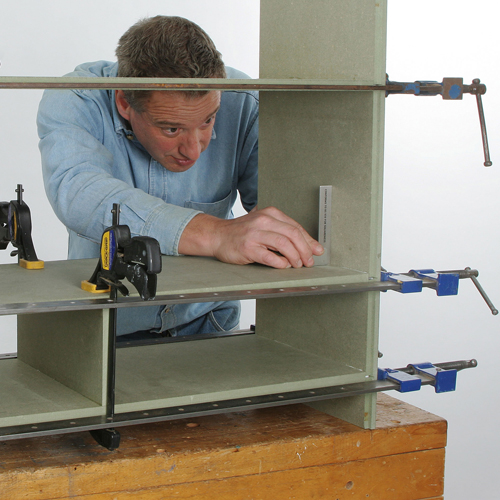
Once everything is clamped up securely, make a few squareness checks as this is your last chance to get it all right. Any small discrepancies will make it much more difficult to fit the drawers later.
Step 4 - Finishing the Carcase and Rebating the Top
Whilst the main carcase is set aside to dry, other parts will have to be machined.
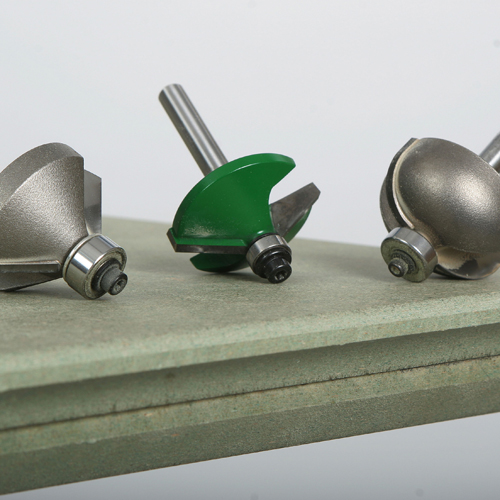
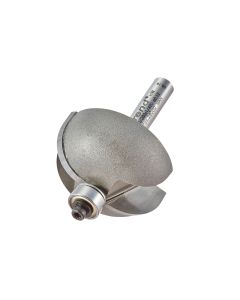
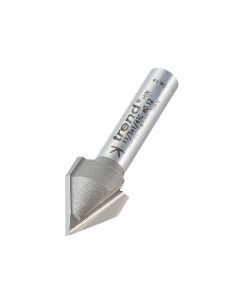
Machine up the second piece for the top, making it slightly bigger to take the required profile. For this I actually used three cutters machining a cove to line up with the underneath 45 degrees chamfer and then a very slight 30 degrees chamfer on the top. Trend Refs. 46/280X1/4TC,46/360X1/4TC and C139X1/4TC
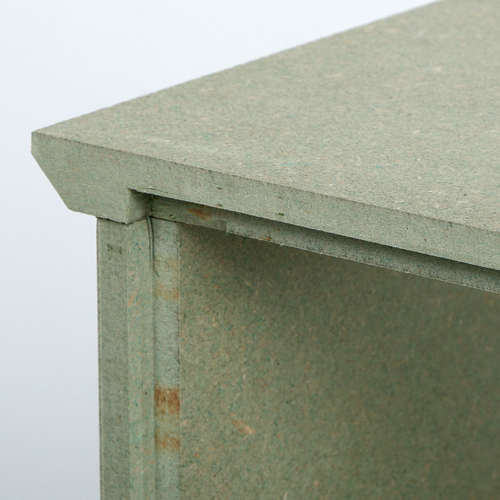
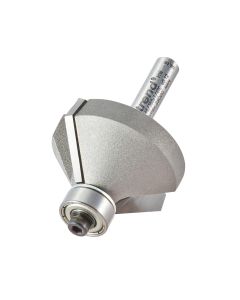
The underneath piece of the top also needs to have a rebate cut in it to take the top, so cut this with the router (using a rebate cutter Trend Ref. 46/39x1/4TC), and then square out the corners by hand with a chisel.
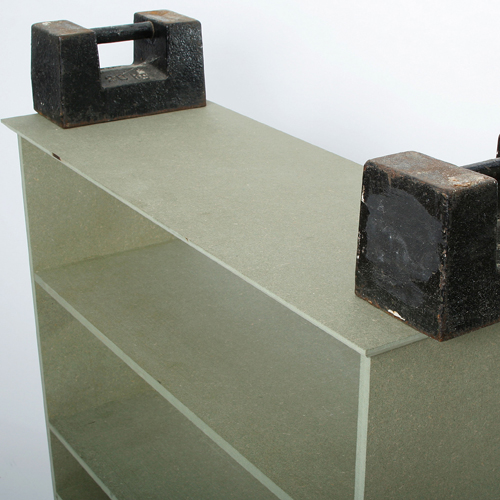
The first layer is glued and then clamped in place using a couple of very heavy weights, but make sure it is standing on a level surface if you use this method. Alternatively use a couple of sash cramps at either end.
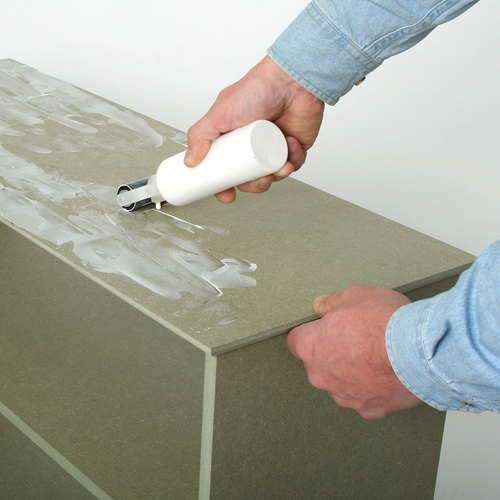
Once it is dry apply glue to the surface of this first layer preferably using a roller to ensure that it is spread evenly. Pay particular attention to getting glue right up to the edges.
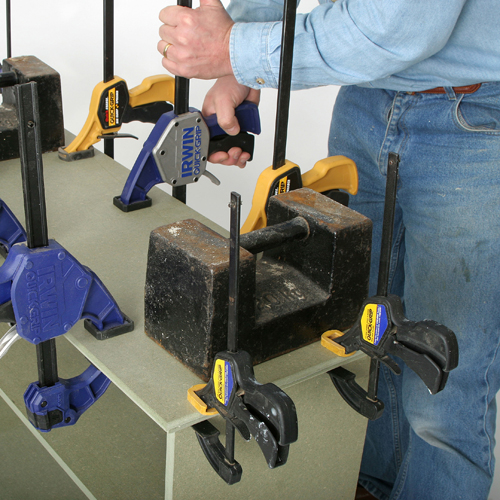
The top layer can then be clamped in place using a mixture of clamps and weights, to make sure the glue line is minimized.
Step 5 - Back Board and Skirting
Some final features including the skirting and backboard need to be routed and fitted.

Cut out a piece of 6mm material for the back and machine on the V grooves to give the impression of tongued and grooved boards. Trend Ref. 11/5X1/4TC.
This can then trimmed to be a neat fit into the rebate in the back of the unit.
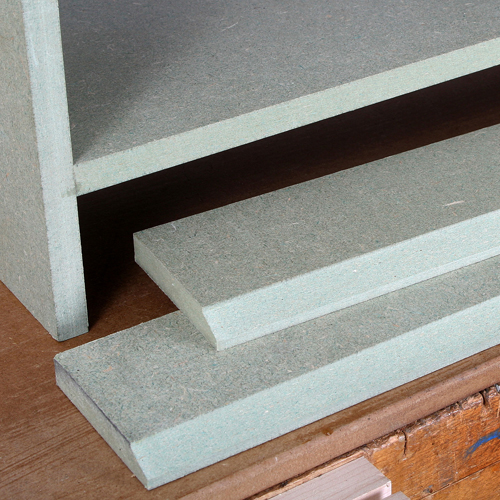
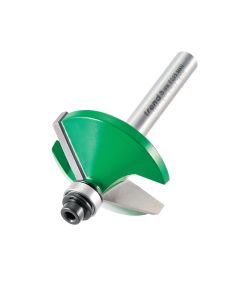
The skirting is just a strip of the same 15 mm MDF with the 30 degrees chamfer machined on one edge. Trend Ref. 46/34X1/4TC.
Cut the mitres first, making several cuts if necessary to get them spot on and then mark off the required length.
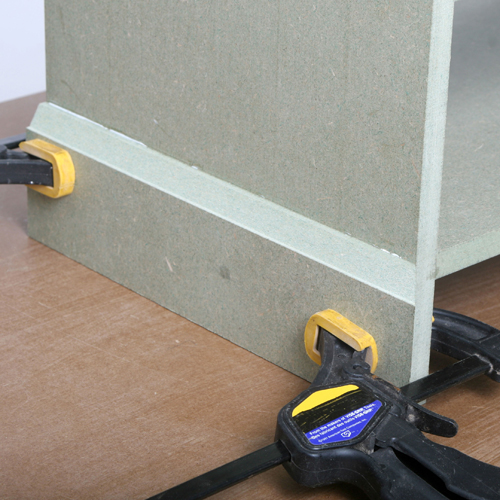
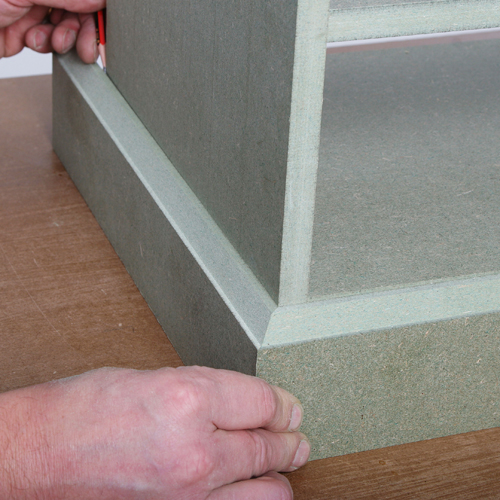
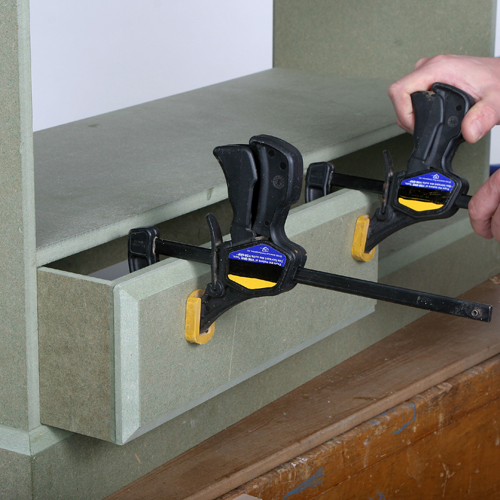
Glue and clamp the two side skirtings in place first.
Then repeat the procedure with the front skirting using plenty of clamps to get the mitre nice and tight.
The drawer boxes are made up a from 10mm MDF, the corner joint being a simple rebate joint which is easily cut on the mitre saw, providing it has a trenching stop.
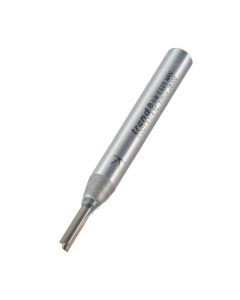
Use 1/8" router cutter to cut a slot in all the drawer box components to take the bottom, in this case a piece of melamine faced hardboard. Trend Ref. 3/10X1/4TC or C001X1/4TC.
Make sure when you glue up the drawer box that the clamps do not push it out of square.
Step 6 - Painting and Final Assembly
Now that the project is nearly done, a few final touches are needed.
The drawer fronts are planted on separately and again are a piece of 15 mm MDF with the 30 degrees chamfer machined all round.
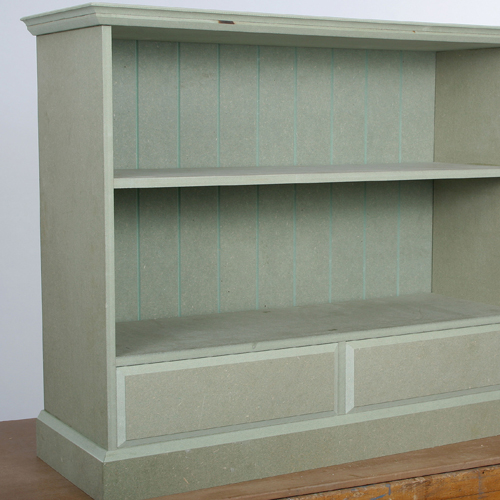
The completed bookcase now just requires some light sanding on any machined edges and it is ready for painting.
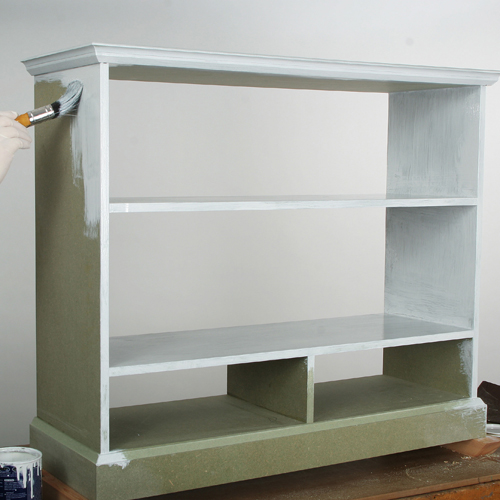
These are various alternatives for finishing MDF, but I usually start with a coat of slightly thinned down wood primer, and then finish off with a couple of coats of standard eggshell paint.
With the painting completed, glue in the back and fix it securely with a few small panel pins.
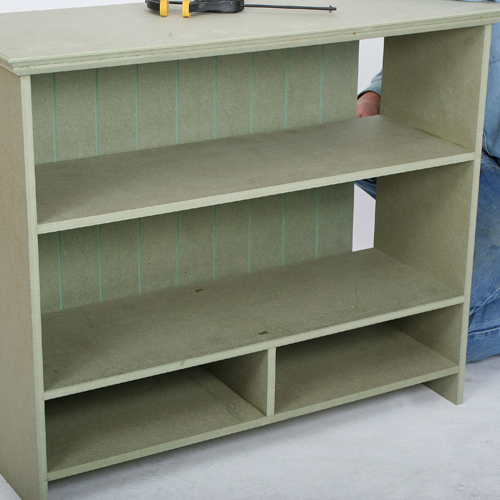
The completed MDF Bookcase Routing Project.
Written by Alan Holtham - Established woodworking author and video producer.