Chopping Box Routing Project
Incorporating a small pullout tray which you can sweep your chopped vegetables to transfer to the pot.


This is an interesting little project which resulted from a request by a local cook shop for some chunky chopping boards that were 'a little different'.
Unfortunately, I didn´t know what you could do to make a chopping board different, apart from altering the shape and playing about with different coloured laminations, so some serious thinking was called for.
Although not strictly necessary the best chopping boards are always laminated up using end grain blocks which are theoretically harder and more resistant to wear. This may be true, but it does make the project a bit more complicated and some accurate working is essential.
Step 1 - Select and Prepare Timber
The starting material for the block was some offcuts of 1 1/2 inch material. Unfortunately there was not quite enough to get all the blocks from a single piece so I chose two with the most consistent grain structure rather than colour.


Then machine the work equally carefully, keeping it tight up against the fence and only taking light cuts.


With one face and edge true, rip the squares out on the bandsaw, again not forcing the cut all you will lose accuracy.


They will have to be thicknessed to get them perfectly square, and I always find that it helps to pass all four faces through the thicknesser as this leaves a much better finish that the planer.
Make a final check to ensure that they are actually perfectly square.


The individual blocks can be cut out on a mitre saw with a fine blade to minimize breakout. If you make a mark on the fence at the required length it is just a question of sliding the timber along and chopping of each successive block. This is accurate enough at this stage as the finished chopping board will be thicknessed after assembly anyway.


Even a fine toothed blade may lead to some breakout on the back of the cut and this must be removed on each block by sanding, so that they will pull up together really tight.


Because I used two different pieces of timber, there was some colour variation within the blocks. But if you mix them all up in a random fashion the colour variation becomes a feature, and it will even out on exposure to the light in due course anyway.
Step 2 - Board glue up, flattening and shaping.
This stage involves the contruction of chopping board through glueing the the blocks into your pattern of choice.


To help with the gluing up process, make a simple assembly jig consisting of two strips screwed to a baseboard at a perfect right angle.


Cover this baseboard and the strips with a piece of paper to prevent the blocks sticking to it and then start assembling them into the board, brushing on an even coat of waterproof PVA.


This takes some time, particularly if you need to juggle about with the colours and grain orientation. I tried to arrange it so that the grain direction was always at 90 degrees to each adjacent piece.


Then use some sash cramps to pull the whole thing together tight into the jig, and leave it to dry at least overnight.


Now back to the chopping board itself. When the top is removed from the cramps the joints should all be good, but the top is not necessarily particularly flat.


Getting all this end grain perfectly smooth presents something of a machining challenge, but the answer is a thicknessing jig for use with the router. This consists of two rebated rails that stradle the chopping board surface.


Once this is set up and the chopping board safely secured, it is just a question of working backwards and forwards across the surface taking off a tiny amount on each pass, to gradually flatten it all out.


Notice the use of sacrificial spacers at either side of the board to avoid damaging the jig. After several light passes you should end up with a perfectly smooth surface, not quite as good as you would get with the planer, but certainly the next best thing.


Repeat the procedure for the other side and then sand up the faces using a random orbit sander, working down the grades to about 180 grit.


At this point I did something rather stupid when really I should have known better. I thought that a light pass of the edges of the block over the planer would clean them up without doing any serious damage. However I underestimated the strength of the vertical grain and chipped the corners and some edges quite severely.


The only way to clean up this damage was to take a light cut on the circular saw using a fine toothed blade, and I hoped that if I repeated the cut on all four sides it would not show.


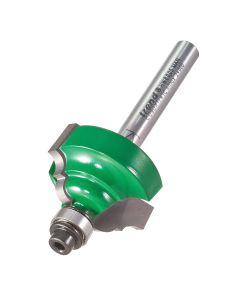
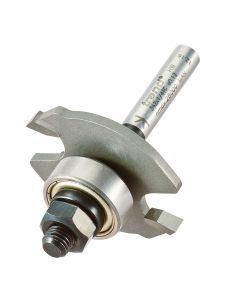
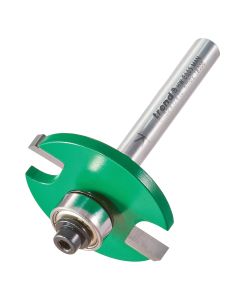
The top edges of the board are then rounded over using a rounding ovor cutter in the router and the lower edges lightly sanded with a tiny radius. Trend Ref. 46/12X1/4TC or C075X1/4TC).
Step 3 - Box preparation, construction & jointing.
Assembling a project that this can be a bit of a nightmare, particularly if you work on your own. But prepare everything thoroughly before you start applying glue and then take your time, the glue does not go off that quickly.


Meanwhile make a start machining up the material for the base section. Thin material is rarely available ready cut, but it is relatively straightforward to re-saw it down from thicker material on the bandsaw.


However with some materials, particularly the likes of maple, this always seems to release a lot off inbuilt stress and the material can sometimes subsequently warp quite alarmingly.


So ideally, I prefer to re-saw the material and then leave it for as long as possible before machining it, to allow the warping to settle down. As I am using dovetails to join up the sides of the box, I also machined some spare material for use as trial pieces for setting up the dovetail jig.


The main body of the box is made up from the thin section maple, dovetailed together at the back using a Trend CDJ300 dovetail jig.


The set-up is quite critical and one thing I have found is that when you are working at one end of the jig, it always helps to pack under the comb at the other end with some similar material, to provide support for the weight of the router which will then ensure a perfect fit of the tails and pins.


Once the jig is properly set up, which will require a trial cut using your spare material, make the first cut in the real workpiece by moving the router from right to left to just sever the fibres.


This will prevent any breakout when you do the main cutting, now working from left to right.


Remember also that opposite sides of the box need to be machined at opposite ends of the jig.


Either adjust the offset guide or alter the width of the material to ensure s balanced appearance of the dovetails.


The cross pieces need to be fixed across the front of the box, I decided to biscuit jointing them using the Trend 342 biscuit jointing set.


For extra support clamp several workpieces side-by-side to machine the groove in the ends.


And use the same procedure for the matching groove in the side pieces.
Step 4 - Box Assmebly, Drawer Construction & Finishing
Assembling a project that this can be a bit of a nightmare, particularly if you work on your own. But prepare everything thoroughly before you start applying glue and then take your time, the glue does not go off that quickly.


Glue up the main box assembly, clamping it firmly but making sure that it remains square as you tighten up.


Drawer runners are needed to guide the drawer into the box and these are just small strips of maple glued and clamped in place.


The drawer front is another simple gluing job, but I clamped it onto the drawer box in situ to make sure the alignment was correct.


The material for the drawer is more of the same, but with a thinner section and with a groove machined on one face to take the base.


The base itself is a piece of Iroko re-sawn from a thicker board, then planed and thicknessed to suit the groove.


The end is shaped with a shallow curve, as are the ends of the drawer sides. It is then a simple matter to glue up the drawer, again using waterproof PVA.


To finish, the whole lot was given two coats of cellulose brushing lacquer to provide a seal, making sure to cover both sides of the block to prevent it warping.


Then when it is dry glue and screw the base onto the top and add four small rubber feet to stop it moving about or scratching the worktop.


Finally, rub down the block with some very fine abrasive paper and apply a couple of coats of food safe salad bowl oil to complete the job.


The completed chopping box.
Related Products
Related Videos
Related Downloads
Related Test Reviews
Related Instructions


Document Download


Document Download


Document Download


Document Download


Document Download


Document Download
Related Files


Document Download


Document Download


Document Download


Document Download


Document Download


